Air fryers have revolutionized the way we cook, offering a healthier, faster, and more convenient way to enjoy our favorite meals. However, keeping your air fryer clean is essential to maintain its performance, ensure food safety, and prolong its lifespan. In this guide, we’ll show you exactly how to clean an air fryer step-by-step, with practical tips to remove grease, eliminate odors, and keep your appliance spotless after every use. Let’s dive in!
Why Cleaning Your Air Fryer is Important
Cleaning your air fryer regularly is more than just a matter of aesthetics—it’s essential for its functionality and your health. Here’s why:
- Prevent Grease Buildup
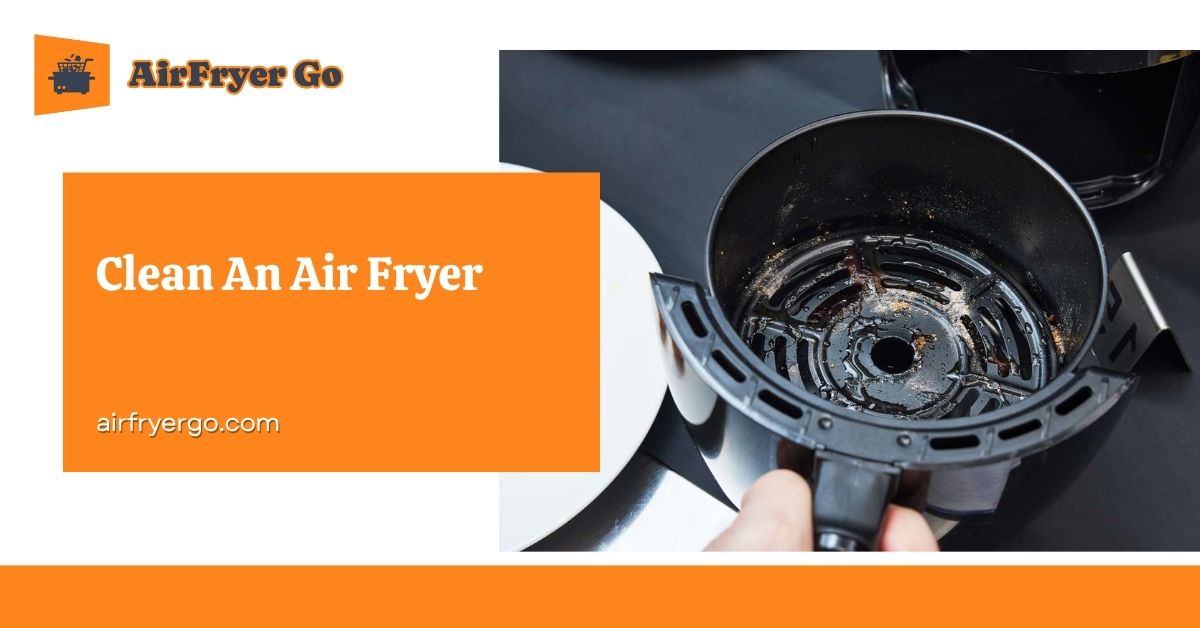
Over time, leftover oil and food particles can accumulate inside your air fryer, leading to unpleasant odors, smoke during use, and even a risk of fire. - Ensure Food Safety
Residual food debris can become a breeding ground for bacteria, compromising the safety and taste of your meals. A clean air fryer helps you prepare food in a hygienic environment. - Maintain Optimal Performance
An unclean air fryer works harder to cook your food, reducing its efficiency and potentially leading to overheating or malfunction. Regular cleaning ensures it operates at its best. - Prolong Appliance Lifespan
Proper care and cleaning protect your air fryer from wear and tear, especially the non-stick coating on the basket and tray. This extends the life of your appliance, saving you money in the long run.
By making it a habit to clean your air fryer, you’re not just preserving its quality—you’re also ensuring every dish is delicious, safe, and hassle-free.
What You’ll Need
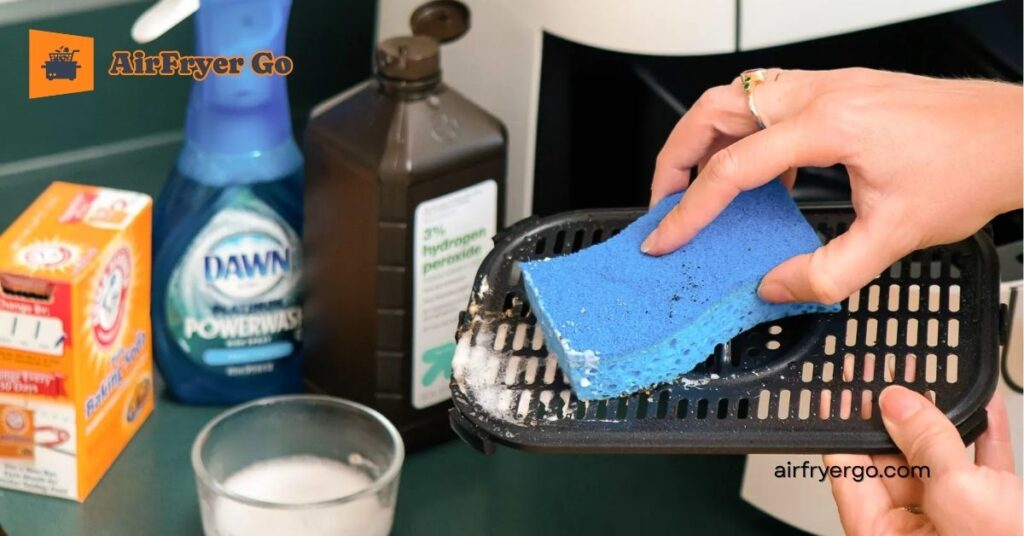
Cleaning your air fryer doesn’t require any fancy equipment—just a few basic tools and materials you likely already have at home. Preparing everything in advance will make the process smooth and efficient. Here’s what you’ll need:
1. Mild Dish Soap
Gentle dish soap is a must for breaking down grease and removing food residue. It’s safe for use on non-stick surfaces and helps keep your air fryer fresh and clean.
2. Soft Sponge or Non-Abrasive Cloth
Choose a soft sponge or cloth to clean your air fryer without scratching its non-stick coating. Avoid anything abrasive, as it could damage the surfaces and reduce the lifespan of your appliance.
3. Non-Abrasive Brush or Toothbrush
For those tricky spots in the basket holes or hard-to-reach corners, a soft-bristled brush or old toothbrush works wonders. These tools make it easy to scrub away stuck-on grease without causing damage.
4. Baking Soda (Optional)
For tough, baked-on grease or stains, baking soda is a natural and effective cleaning agent. Simply mix it with a little water to form a paste and apply it to the affected areas for gentle scrubbing.
5. Microfiber Towel or Lint-Free Cloth
Drying your air fryer thoroughly after cleaning is crucial to prevent rust or water stains. A microfiber towel is ideal for absorbing water and leaving a streak-free finish.
6. Optional: Specialized Cleaning Products
If you prefer convenience, consider using air fryer-specific cleaning sprays or disposable liners. These products are designed to simplify maintenance while protecting your appliance.
Pro Tips for a Hassle-Free Cleaning Process
- Avoid Harsh Chemicals: Never use bleach, ammonia, or strong detergents, as they can damage the non-stick coating and affect food safety.
- Skip Abrasive Tools: Metal scrubbers or hard brushes might remove tough grime but can leave permanent scratches. Stick to softer options.
- Prepare a Dedicated Cleaning Spot: Set up near a sink with warm water for easy rinsing and washing.
With the right tools in hand, cleaning your air fryer becomes a straightforward task that takes just minutes. Investing this small amount of effort ensures your appliance stays in great shape and delivers delicious, healthy meals every time!
Step-by-Step Guide How to Clean an Air Fryer
Cleaning your air fryer may seem like a hassle, but it’s actually quick and simple when you break it down into easy steps. By taking a few minutes after each use to maintain your air fryer, you’ll enjoy better-tasting meals and a longer-lasting appliance. Let’s get started!
Step 1: Unplug and Let It Cool Down
Safety comes first! Before cleaning, ensure your air fryer is unplugged and completely cooled. Attempting to clean a hot appliance can cause burns or damage its components.
Pro Tip: To speed up cooling, leave the basket or tray open for a few minutes after use.
Step 2: Remove and Disassemble Removable Parts
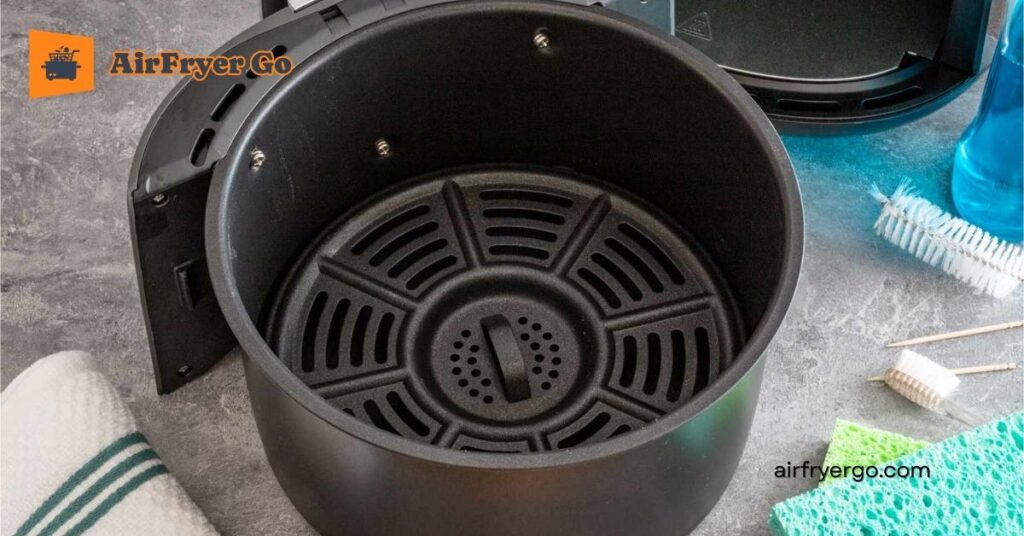
Take out all detachable parts, including the basket, tray, and any inserts. These components are usually where grease, crumbs, and food residue collect the most.
- If your model includes a detachable heating element cover, carefully remove it following the user manual.
Why This Matters: Removing parts ensures you can clean every nook and cranny, leaving nothing behind that could cause odors or buildup.
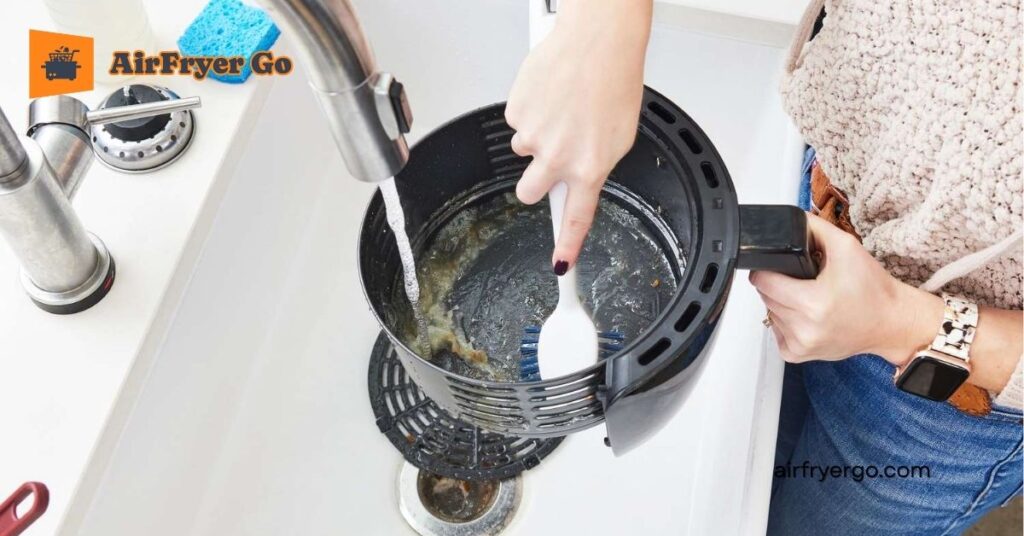
Step 3: Soak and Wash the Removable Parts
- Fill your sink or a large basin with warm water and a few drops of mild dish soap.
- Place the basket and tray into the soapy water and let them soak for 10–15 minutes.
- After soaking, use a soft sponge or non-abrasive brush to gently scrub away grease and food debris.
Pro Tip: If your air fryer parts are dishwasher-safe, you can place them on the top rack for easy cleaning. However, hand washing extends their lifespan.
Step 4: Wipe Down the Interior
- Use a damp cloth or sponge with a small amount of dish soap to gently clean the interior walls of the air fryer.
- Be careful not to let water drip into electrical components or touch the heating element directly.
- For stuck-on food or grease, dampen the area and let it sit for a few minutes before wiping clean.
Pro Tip: Use a toothbrush or small brush to clean tight spots or corners for a thorough job.
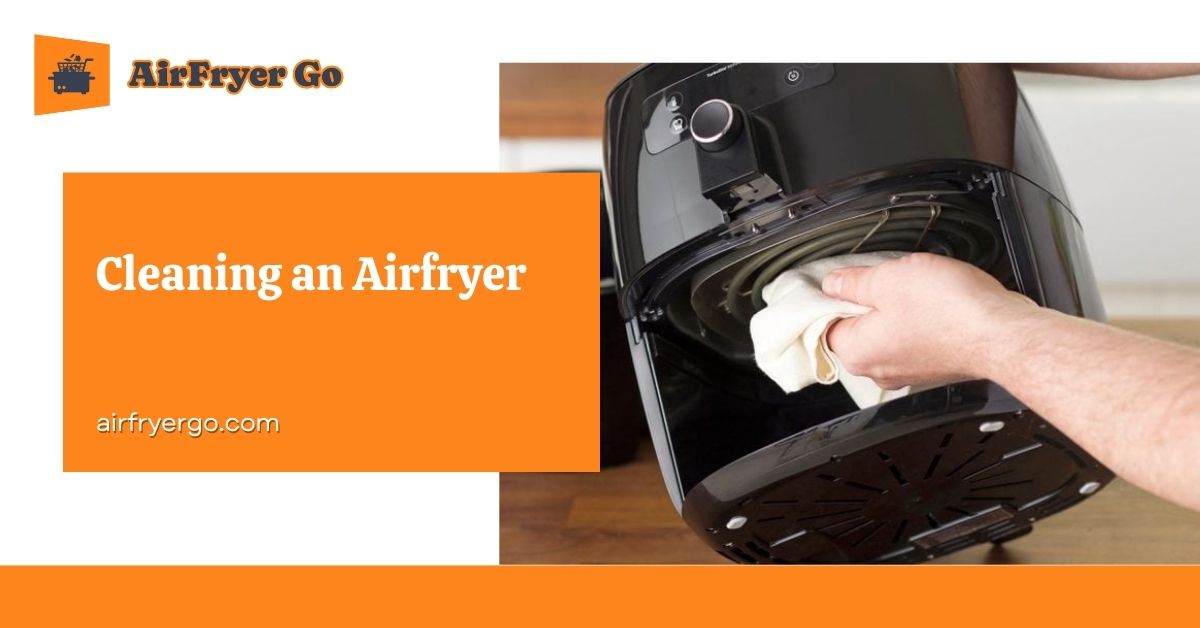
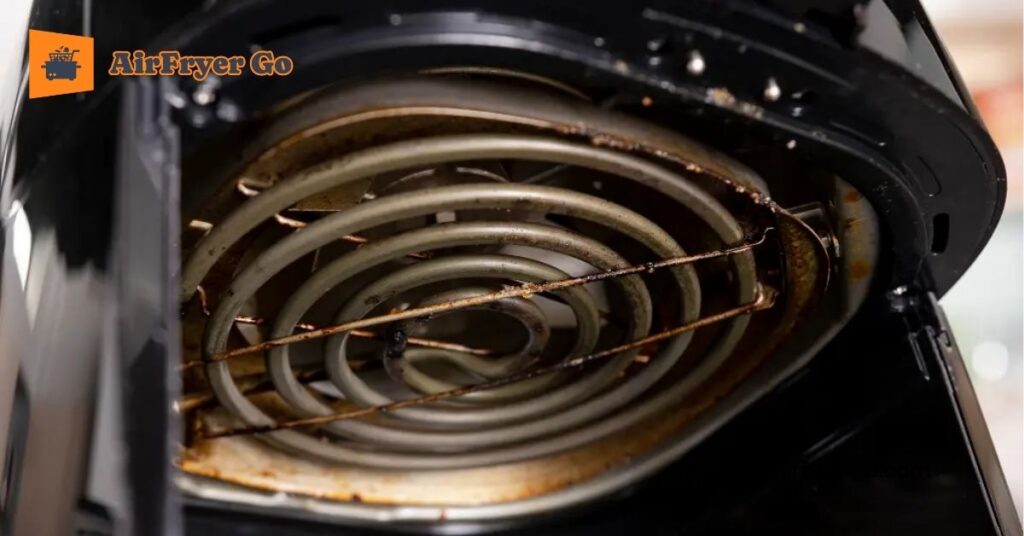
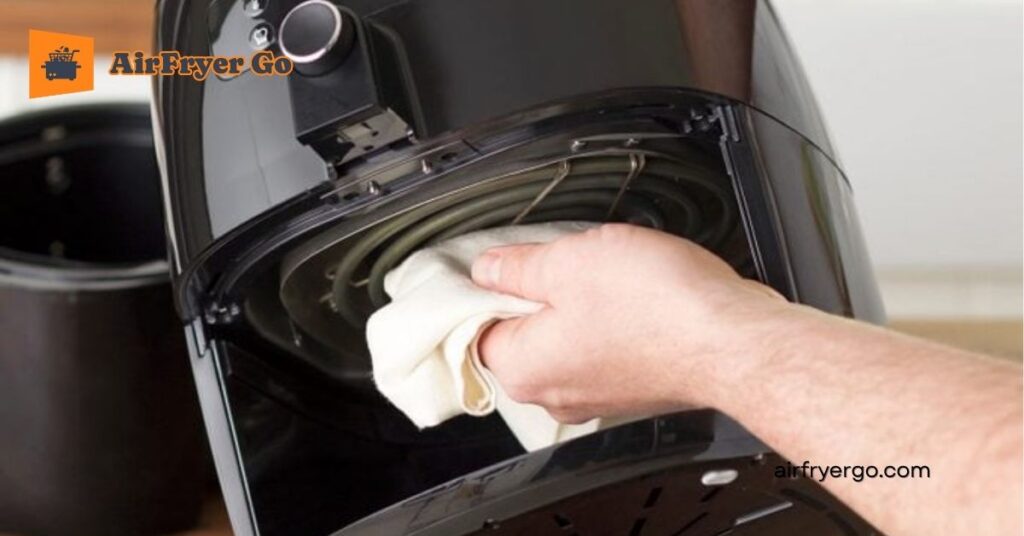
Step 5: Clean the Heating Element
- Turn your air fryer upside down or tilt it to access the heating element.
- Wipe it gently with a damp cloth to remove any grease splatter or crumbs.
- Avoid scrubbing too hard or using abrasive tools, as this can damage the element.
Step 6: Handle Tough Stains with Baking Soda
For stubborn stains or greasy spots, try a natural cleaning paste:
- Mix equal parts baking soda and water to form a thick paste.
- Apply the paste to the stained area and let it sit for 10 minutes.
- Scrub gently with a soft brush, then wipe away with a damp cloth.
Step 7: Wipe Down the Exterior
Don’t forget the outside of your air fryer! Grease and fingerprints can make it look grimy.
- Use a damp microfiber cloth to wipe the exterior surfaces.
- For stubborn smudges, add a drop of dish soap to the cloth, then dry with a clean towel.
Why This Matters: A clean exterior not only looks better but also ensures the appliance remains pleasant to handle.
Step 8: Thoroughly Dry and Reassemble
- Dry all parts completely using a microfiber towel or air-drying rack to prevent rust and water spots.
- Once dry, reassemble the basket, tray, and other components.
Pro Tip: Run the air fryer for 1–2 minutes without food to ensure all moisture has evaporated before storing or using it again.
Additional Tips for Keeping Your Air Fryer Clean
- Clean After Every Use: Prevent stubborn buildup by wiping down the interior and washing parts immediately after cooking.
- Use Liners or Parchment Paper: These can catch grease and crumbs, making cleanup a breeze.
- Inspect Regularly: Check the non-stick coating for scratches and replace damaged components to ensure safe cooking.
By following this step-by-step guide, you’ll keep your air fryer in top-notch condition, ready to deliver delicious, healthy meals every time. Happy cooking!
Extra Tips for Maintaining Your Air Fryer
Taking proper care of your air fryer doesn’t just keep it clean; it also helps your appliance last longer, ensures consistent cooking performance, and saves you time in the long run. These extra tips are designed to make maintenance easy and stress-free.
1. Clean Your Air Fryer After Every Use
Grease and food particles can harden if left unattended, making cleaning more difficult. To avoid this, make it a habit to clean your air fryer shortly after each use.
- Let it cool completely before cleaning.
- Remove and wash the basket, tray, and other removable parts with warm soapy water.
- Wipe the interior with a damp cloth to prevent grease buildup.
Why It’s Important: Regular cleaning keeps your air fryer looking and working like new while preventing odors.
2. Use Parchment Paper or Liners
Liners specifically designed for air fryers or simple parchment paper can catch food crumbs and grease during cooking.
- Place the liner inside the basket before adding food.
- Make sure the liner doesn’t obstruct airflow to ensure your food cooks evenly.
Bonus Tip: Always use liners that are heat-safe and suitable for your air fryer model.
3. Avoid Overloading the Basket
Overcrowding the basket can lead to uneven cooking and grease splattering. This not only affects your food’s quality but also makes cleaning more challenging.
- Follow the manufacturer’s recommendations for the maximum capacity of your air fryer.
- Cook in smaller batches if necessary.
Why It’s Important: Proper spacing allows hot air to circulate, ensuring even cooking and reducing mess.
4. Regularly Check the Heating Element
The heating element is a critical component of your air fryer that can accumulate grease and residue over time.
- Tilt or turn your air fryer upside down to access the heating element.
- Gently wipe it with a damp cloth after every few uses.
- For stubborn grease, use a toothbrush or non-abrasive brush to clean gently.
Pro Tip: Avoid using excessive water near the heating element to prevent electrical damage.
5. Protect the Non-Stick Coating
The non-stick coating on your air fryer basket and tray is sensitive to scratches and damage.
- Always use soft sponges or cloths for cleaning.
- Avoid metal utensils or abrasive scrubbers that can harm the coating.
Why It’s Important: A well-maintained coating prevents food from sticking and makes cleaning much easier.
6. Store Your Air Fryer Properly
Storing your air fryer in a safe and dry place protects it from damage and ensures it’s ready to use when you need it.
- Dry all parts thoroughly after cleaning to prevent rust.
- Keep the appliance in a cool, dry location away from moisture or direct sunlight.
Bonus Tip: If space allows, store the air fryer with the basket slightly open to improve airflow and prevent odors.
7. Perform a Monthly Deep Clean
In addition to daily cleaning, set aside time for a more thorough cleaning session at least once a month.
- Disassemble all removable parts and wash them thoroughly.
- Inspect the interior for hidden grease or residue, especially around vents and corners.
- Wipe down the exterior to keep it looking polished and new.
Why It’s Important: A deep clean ensures no hidden dirt or grease is left to impact the appliance’s performance.
8. Choose the Right Cleaning Products
For stubborn grease or odors, specialized air fryer cleaning sprays or degreasers can make the job easier.
- Opt for products that are non-toxic and safe for non-stick surfaces.
- Avoid bleach or harsh chemicals that could damage the appliance.
Pro Tip: A simple baking soda paste is a natural and effective solution for tackling tough stains.
9. Follow the Manufacturer’s Instructions
Each air fryer is unique, and the user manual provides specific guidelines for cleaning and maintenance.
- Refer to the manual to know which parts are dishwasher-safe.
- Understand the recommended cleaning methods for your specific model.
Why It’s Important: Following the manufacturer’s instructions ensures you won’t void the warranty or accidentally damage the appliance.
10. Be Mindful of Electrical Components
The main unit of your air fryer contains sensitive electrical components that should never be submerged in water.
- Wipe the exterior and control panel with a damp cloth.
- Use caution when cleaning near vents or openings.
Bonus Tip: A can of compressed air can be helpful for removing dust or debris from tight spaces.
By following these extra tips, maintaining your air fryer becomes a hassle-free task. Not only will your appliance look and perform like new, but you’ll also enjoy consistent, delicious meals every time you use it. A little care goes a long way in making your air fryer a reliable kitchen companion!
Common Mistakes to Avoid
Even with the best intentions, it’s easy to make mistakes that can harm your air fryer’s performance or lifespan. Avoid these common pitfalls to keep your appliance in excellent condition.
1. Forgetting to Unplug Before Cleaning
One of the most basic safety precautions is often overlooked: unplugging the air fryer before cleaning.
- Always unplug the appliance to prevent electrical shocks or accidental damage.
- Let it cool completely before handling.
Why It Matters: Cleaning while the air fryer is still hot or plugged in can lead to injuries or electrical hazards.
2. Submerging the Main Unit in Water
The main unit of your air fryer contains electrical components that are not water-resistant.
- Never immerse the main body in water or rinse it under running water.
- Instead, wipe it down with a damp cloth and avoid getting liquid into vents or buttons.
Pro Tip: Use compressed air to clean debris from hard-to-reach areas.
3. Using Abrasive Scrubbers or Harsh Chemicals
While it may be tempting to use steel wool or strong cleaners for tough stains, doing so can damage your air fryer.
- Stick to soft sponges, non-abrasive brushes, and mild dish soap.
- Avoid bleach, ammonia, or harsh degreasers that could harm the non-stick coating.
Why It Matters: Abrasive materials and chemicals can scratch or peel the coating, reducing the appliance’s performance.
4. Neglecting the Heating Element
The heating element often gets overlooked, even though it’s crucial to the air fryer’s function.
- Regularly inspect and clean the heating element to remove grease and crumbs.
- Avoid using water directly on the element; instead, use a damp cloth or brush for cleaning.
Why It Matters: A dirty heating element can lead to smoke, uneven cooking, or even overheating.
5. Ignoring Tough Stains and Grease Buildup
Letting grease and food residue accumulate over time makes cleaning much harder.
- Address spills and splatters as soon as possible.
- For tough spots, use baking soda paste or soak parts in warm soapy water.
Pro Tip: Cleaning after every use prevents long-term buildup and bad odors.
6. Overloading the Dishwasher
While many air fryer parts are labeled dishwasher-safe, overloading your dishwasher or using high heat can still damage them.
- Place parts on the top rack and use a gentle cycle to avoid warping or scratching.
- Hand wash when in doubt, especially for components with delicate non-stick coatings.
Why It Matters: Dishwashers can sometimes cause wear and tear, especially on cheaper or older parts.
7. Using Metal Utensils
Metal utensils can scratch the non-stick surface, making it harder to clean and potentially impacting the safety of your food.
- Use silicone, wooden, or plastic utensils when cooking or handling food in the air fryer.
Pro Tip: If scratches occur, consider replacing the basket or tray to maintain safety and efficiency.
8. Skipping Regular Maintenance
Deep cleaning and inspection shouldn’t be left until problems arise.
- Perform a thorough cleaning at least once a month, even if you use your air fryer infrequently.
- Check for wear and tear, like peeling coatings or damaged components.
Why It Matters: Preventive maintenance extends the life of your appliance and avoids costly repairs.
9. Blocking the Air Vents
Air fryers rely on proper ventilation for even cooking. Blocking the vents can cause overheating or poor performance.
- Never place your air fryer against a wall or other objects that obstruct airflow.
- Clean vents regularly to ensure they are free of dust or debris.
Pro Tip: Allow at least a few inches of space around the air fryer during use.
10. Overloading the Basket
Adding too much food at once can lead to uneven cooking and grease splattering onto the heating element.
- Follow the manufacturer’s recommendations for the maximum food capacity.
- Cook in smaller batches for better results and easier cleanup.
Why It Matters: Overloading not only impacts cooking quality but also creates unnecessary mess and wear.
Avoiding these common mistakes ensures your air fryer stays in top shape, delivering consistently delicious meals and lasting for years. By practicing proper cleaning and maintenance habits, you’ll enjoy the full benefits of this versatile kitchen appliance without the hassle of unnecessary repairs or replacements.
FAQs
Here are some of the most commonly asked questions about cleaning and maintaining your air fryer to help you keep your appliance in top shape.
1. How often should I clean my air fryer?
You should clean your air fryer after every use to prevent grease and food buildup. Regular maintenance ensures it remains odor-free and performs efficiently.
2. Can I put my air fryer basket and tray in the dishwasher?
Most air fryer baskets and trays are dishwasher-safe, but it’s always best to check your user manual first. Hand washing with mild soap can help prolong the life of non-stick coatings.
3. How do I remove stubborn grease or burnt-on food?
For tough stains, soak the basket and tray in warm, soapy water for 15–20 minutes. You can also use a baking soda paste (baking soda and water) to gently scrub stubborn spots.
4. Can I use metal utensils to clean or cook in my air fryer?
Avoid using metal utensils, as they can scratch the non-stick coating of your air fryer basket. Opt for silicone, wooden, or plastic tools instead.
5. Is it safe to use vinegar or baking soda for cleaning my air fryer?
Yes, both vinegar and baking soda are safe and effective for cleaning. Baking soda is excellent for tackling grease, while vinegar can help remove odors.
6. Do I need to clean the heating element?
Yes, the heating element should be cleaned regularly to prevent grease buildup. Use a damp cloth to gently wipe it down, and ensure the appliance is unplugged and cool before cleaning.
7. What happens if I don’t clean my air fryer regularly?
Neglecting to clean your air fryer can lead to:
- Grease buildup that causes smoke during cooking.
- Unpleasant odors.
- Reduced cooking performance and uneven heating.
- A shorter lifespan for the appliance.
8. Can I submerge the main unit of my air fryer in water?
No, the main unit of your air fryer contains electrical components and should never be submerged in water. Wipe it down with a damp cloth instead.
9. How can I prevent food from sticking to my air fryer basket?
To prevent sticking:
- Lightly coat the basket with cooking spray or oil before use.
- Avoid overloading the basket to ensure even airflow and cooking.
- Use parchment paper liners designed for air fryers.
Conclusion
Cleaning your air fryer doesn’t have to be a daunting task. With the right techniques and a little regular maintenance, you can keep your appliance spotless, functioning efficiently, and ready to deliver crispy, delicious meals every time.
A clean air fryer not only enhances the flavor and quality of your food but also prolongs the life of your appliance, saving you money and time in the long run. By following the steps and tips outlined in this guide, you’ll enjoy the full benefits of your air fryer with minimal effort.
For more expert advice, maintenance tips, and recipe ideas, visit AirFryer Go—your ultimate guide to making the most out of your air fryer. With our support, you’ll master your air fryer and create delicious, healthy meals effortlessly.
A well-maintained air fryer is the secret to healthier, tastier meals for you and your family. Happy cooking with AirFryer Go!

