Mastering air fryer beef recipes at home can be intimidating—especially when you’re staring down a premium cut of steak and worrying about overcooking it to a dry, gray finish. At AirFryer Go, we’ve moved past the guesswork to help you achieve that elusive “golden ratio”: a perfectly caramelized crust on the outside with a tender, juicy center every single time.
From restaurant-quality filet mignon to quick, family-favorite ground beef dinners, this guide provides the exact temperatures and timing you need to turn your air fryer into your most trusted tool for cooking beef. Let’s stop settling for subpar results and start searing like a pro.
>>> Read More: The Ultimate Air Fryer Recipe Index: 101+ Easy & Healthy Ideas for Every Meal
The Science of Air Frying Beef
To master air fryer beef recipes, you must first shift your mindset from “baking” to “searing.” Unlike chicken, which is relatively forgiving, beef is a precision protein. The difference between a succulent, medium-rare Filet Mignon and a dry, fibrous piece of meat is often a matter of just two or three minutes.
1. The Physics of Surface Searing
The biggest challenge when cooking beef in an air fryer is the absence of a traditional heavy-bottomed skillet that conducts heat directly into the meat. To compensate, the air fryer relies on high-velocity convection.
- The Maillard Reaction: This chemical reaction—where amino acids and reducing sugars create the savory, brown crust we crave—requires dry heat and temperatures above 300 degrees F (150 degrees C).
- The Secret: If your beef is damp, the air fryer will steam the surface before it browns. Always pat your steak completely dry with paper towels. For an even more professional crust, apply a light coat of high-smoke-point oil (like avocado or grapeseed oil) to help conduct the heat more effectively across the surface.
2. Understanding Protein Denaturation
Beef is comprised of muscle fibers surrounded by collagen. As temperature rises, these fibers contract and squeeze out moisture.
- The “Danger Zone”: Because air fryers circulate superheated air, the exterior of your steak can hit 400 degrees F (200 degrees C) while the center is still cold. This is why we use a “High-Heat Finish” strategy.
- The Internal Temperature Buffer: Meat continues to cook after it leaves the heat source (carry-over cooking). For the best results, pull your beef out when it is 5 degrees F (3 degrees C) below your target temperature.
3. Managing the “Smoke Factor”
Beef—especially cuts like ribeye or ground beef—contains rendered fat that drips into the basket. When this fat hits the heating element, it vaporizes, creating the smoke that often triggers alarms.
- The “Pro” Barrier: To keep your kitchen clear, add two tablespoons of water or a thick slice of bread to the bottom of the air fryer basket (underneath the tray or rack). The water creates a cooling buffer, and the bread acts as an absorbent sponge for dripping fat, preventing it from burning.
- Cleanliness: Always start with a clean basket. Carbonized grease from yesterday’s dinner will smoke the moment you crank the heat for today’s steak.
4. The “Against the Grain” Rule
Regardless of how perfectly you air-fry your beef, the final texture is determined at the cutting board.
- Identify the Grain: Look for the visible lines of muscle fiber.
- Slice Against: Use a sharp knife to cut perpendicular to these lines. This shortens the muscle fibers, making even slightly overcooked beef feel tender and buttery on the palate. If you slice with the grain, you are forcing your teeth to chew through long, tough strands.
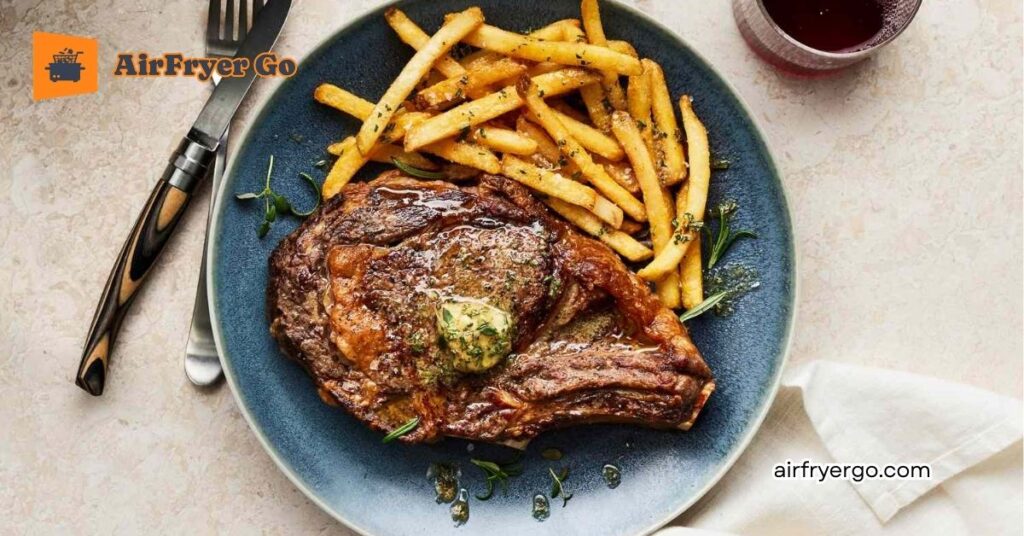
The Perfect Air Fryer Steak
>>> Read More: Crispy Air Fryer French Fries with No Oil: A Step-by-Step Recipe
To master air fryer beef recipes for steaks, you must stop guessing. The goal here is a deep, flavorful crust and a center that is buttery-tender.
The Master Base Method (For all recipes below)
- Temperate Rise: Take the steak out of the fridge 30 minutes before cooking. This ensures even heat penetration.
- Surface Dry: Pat the steak bone-dry with paper towels—this is the non-negotiable secret to a perfect crust.
- Oil & Season: Brush lightly with high-smoke-point oil (avocado or grapeseed). Apply a coarse dry rub or salt/pepper mix just before placing in the basket.
- The Cook: Preheat to 400 degrees F (200°C).
- The Pull: Use a digital thermometer! Pull at 130 degrees F (54 °C) for Medium-Rare.
- The Rest: Let it sit for 5–10 minutes.
5 Ways to Flavor Your “Perfect” Steak
| Recipe Style | Key Ingredients | Pro Tip |
| 1. Classic Garlic-Herb | Sea salt, coarse black pepper, fresh rosemary, garlic cloves. | Place the garlic and rosemary on top of the steak for the final 3 minutes. |
| 2. Peppercorn Crust | Cracked black/white peppercorns, coriander seeds. | Press the crushed peppercorns firmly into the meat before cooking. |
| 3. Coffee-Chili Rub | Espresso grounds, chili powder, brown sugar, cumin. | The espresso enhances the beef’s natural savory depth without making it taste like coffee. |
| 4. Steakhouse Butter | Salted butter, blue cheese crumbles, chives. | Place a dollop of this butter on the steak immediately after pulling it, so it melts during the rest. |
| 5. Chimichurri Finish | Parsley, cilantro, vinegar, garlic, olive oil. | Keep the steak rub simple (salt/pepper). Pour the fresh, cold Chimichurri over the hot steak just before serving. |
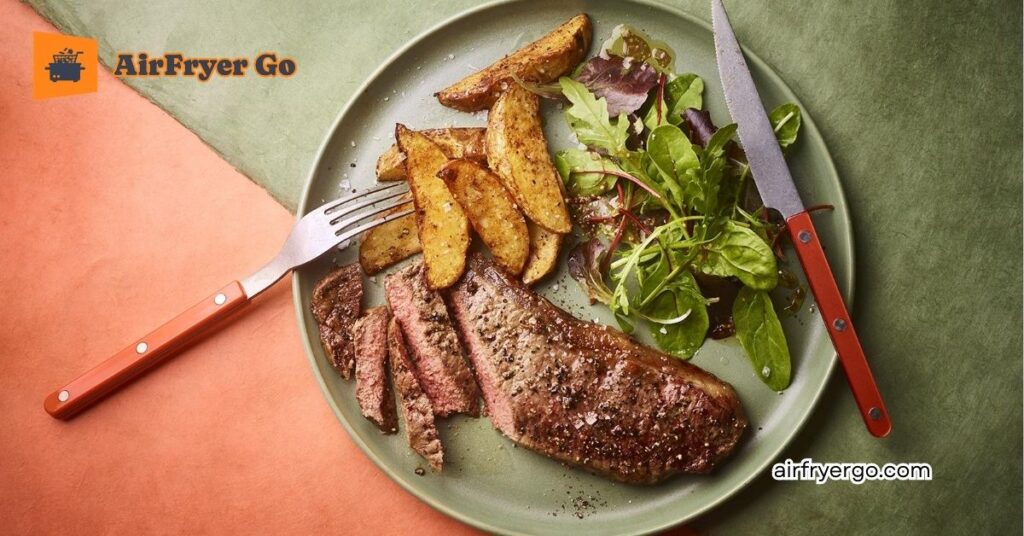
Tips for Perfect Steaks
- Thickness Matters: This method works best for steaks 1 to 1.5 inches thick. If your steak is thinner than 1 inch, reduce the cooking time by 2–3 minutes to avoid overcooking.
- The “Probe” Advantage: If your air fryer has a built-in thermometer probe, use it! It allows you to monitor the internal temperature in real-time without opening the basket and losing precious heat.
- Why 400 Degrees? We use the maximum heat setting because steak is a short-duration cook. We need to hit that Maillard reaction immediately to build the crust before the center moves past Medium-Rare.
- Avoid the “Steam Trap”: Do not wrap the steak in foil while cooking. You want the circulating air to hit every square inch of that surface. Save the foil for the resting period if you want to keep it warm, but even then, a light tent is better than a tight wrap.
Air Fryer Ground Beef & Hamburgers
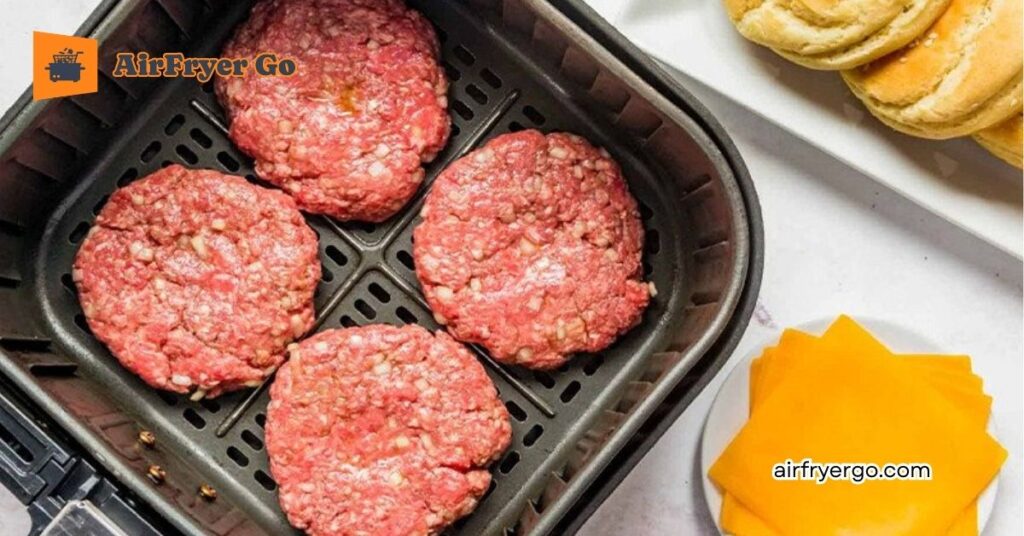
This section is designed to turn your air fryer into the ultimate diner-style kitchen tool. Cooking ground beef in an air fryer often intimidates people—they fear the meat will turn into a gray, steamed lump. The secret at AirFryer Go is high heat and proper aeration.
The Master Base Method (For all recipes below)
- Even Shaping: For burgers, use a mold or your hands to ensure uniform thickness (ideally 0.75 to 1 inch). This ensures the edges and the center finish at the same time.
- The “Dimple” Hack: Press a small thumbprint into the center of each patty. This prevents the burger from “doming” or ballooning as it cooks.
- The Cook: Preheat to 375 degrees F (190 degrees C).
- Time: 10–12 minutes for burgers; 6–8 minutes for loose ground beef (shaking every 2 minutes).
- The Pull: Aim for an internal temperature of 160 degrees F (71 degrees C).
5 Ways to Flavor Your Ground Beef & Burgers
| Recipe Style | Key Ingredients | Pro Tip |
| 1. Classic “Diner” Smash | Kosher salt, cracked pepper, garlic powder. | Don’t overwork the meat. Keep it loose and cold before shaping for maximum juiciness. |
| 2. Loaded Taco Beef | Cumin, chili powder, paprika, diced onions. | For loose beef, spread it thinly across the basket to allow airflow; shake halfway. |
| 3. Bacon-Cheddar Melt | Sharp cheddar, bacon bits, Worcestershire sauce. | Add the cheese slice only in the final 60 seconds to prevent it from blowing away. |
| 4. Mediterranean Burger | Dried oregano, crumbled feta, finely minced kalamata olives. | The saltiness of the feta creates an incredible crust on the exterior of the patty. |
| 5. Sweet & Smoky BBQ | Smoked paprika, onion powder, brown sugar. | Brush with a thin layer of BBQ sauce during the last 2 minutes for a sticky, caramelized edge. |
Tips for Ground Beef & Burgers
- Avoid the “Steam Trap”: When cooking loose ground beef (for tacos or chili), never dump a solid block into the basket. Break it into large, uneven chunks. As it cooks, continue to break it apart with tongs. This allows the hot air to hit the surface of every piece, creating those coveted “browned” bits.
- The Bread Crumbs Secret: If you like an exceptionally juicy burger, mix 1/4 cup of panko breadcrumbs and a tablespoon of milk into your ground beef before shaping. This “panade” acts as a sponge, holding onto the juices that would otherwise drip away.
- Why 375 Degrees F? Burgers need to cook fast to stay juicy, but 400 degrees F can char the outside of a thick burger too much before the center is cooked. 375 degrees F is the “Golden Zone” for ground beef to ensure the center reaches safety without the exterior becoming burnt.
- Resting is Still Required: Even for burgers, let them sit for 3 minutes after taking them out. If you bite in immediately, the juices will run down your hand instead of staying in the meat.
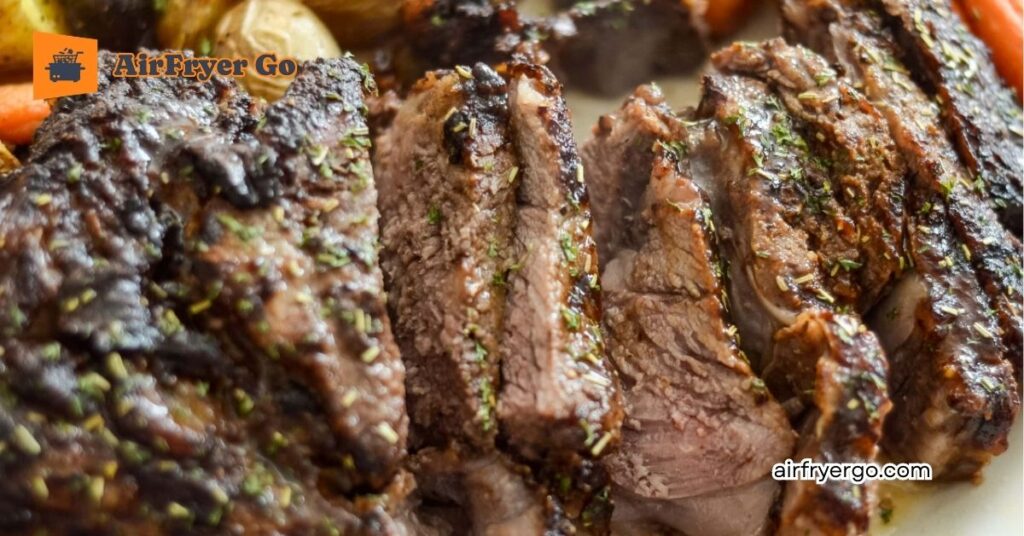
Specialty Cuts (Tri-Tip & Ribs)

For specialty cuts like Tri-Tip and Ribs, the air fryer acts as a high-heat convection oven that mimics a smoker. Because these cuts are thicker or contain bones, the key is the “Low and Slow” + “High-Heat Finish” technique.
The Master Base Method
- Tri-Tip: Aim for a “Reverse Sear”—low heat until it hits 125°F (52°C), then a quick blast at high heat to crust.
- Ribs: The “Steam & Glaze” method is essential. Use foil to lock in moisture during the cooking phase, then remove the foil for the final crisping.
5 Specialty Beef Recipes
| Recipe Style | Cut | Key Technique | Pro Tip |
| 1. Santa Maria Tri-Tip | Tri-Tip | 325°F (163°C) roast. | Rub heavily with garlic salt and pepper; sear last. |
| 2. Sticky Glazed Short Ribs | Beef Ribs | Par-cook in foil at 350°F (177°C). | Glaze with soy-ginger sauce for the final 8 minutes. |
| 3. Coffee-Rubbed Roast | Tri-Tip | Low-temp cook to 130°F (54°C). | The bitter coffee rub creates an incredible bark. |
| 4. BBQ “Fall-off-the-Bone” Ribs | Beef Ribs | Use a rib rack to fit the basket. | Add 2 tbsp apple cider vinegar in the foil packet. |
| 5. Herb-Crusted Tri-Tip | Tri-Tip | Sear at 400°F (204°C) for 3 mins. | Use a mix of fresh rosemary and thyme in the crust. |
Tips for Specialty Cuts
- The “Against the Grain” Rule (Crucial for Tri-Tip): Tri-tip muscle fibers run in different directions. Always check your slice angle. If you cut with the grain, the meat will be chewy regardless of how well you cooked it.
- Internal Temp is King: Specialty cuts are expensive. Do not guess with a timer. Use a leave-in digital thermometer and pull the meat 5°F (3°C) before your target temperature; it will continue to rise during the rest period.
- Managing Fat (The Smoke Hack): If you are cooking fatty short ribs, place a slice of sourdough bread in the bottom of the basket. It will soak up the grease and prevent the smoke alarms from going off.
- The Resting Period: Because these are denser cuts, they need at least 15 minutes of resting time. This allows the internal juices to redistribute; if you cut immediately, the moisture will end up on the cutting board rather than in the meat.
Master Cooking Chart
This Master Cooking Chart is the essential reference for your AirFryer Go readers. Whether they are cooking a quick weeknight burger or a Sunday specialty roast, this guide ensures precision, safety, and—most importantly—juicy results.
Note: All times are based on an air fryer preheated to the indicated temperature. Always flip your food halfway through the cooking process.
| Beef Cut | Temp (F) | Temp (C) | Est. Time (Min) | Target Internal (F) |
| Steak (1″ thick) | 400 | 200 | 8–10 | 135 (Med-Rare) |
| Steak (1.5″ thick) | 400 | 200 | 10–12 | 135 (Med-Rare) |
| Hamburgers | 375 | 190 | 10–12 | 160 (Well) |
| Ground Beef (Loose) | 375 | 190 | 6–8 | 160 (Well) |
| Tri-Tip Roast | 325 | 163 | 25–35 | 135 (Med-Rare) |
| Beef Ribs | 350 | 177 | 25 (Foil) + 10 | Fall-off-bone |
Pro-Tips for Using This Chart
1. The “Safety First” Protocol
Beef is a premium protein, and overcooking it is a costly mistake. Rely on a digital instant-read thermometer rather than the clock. The times above are estimates; the internal temperature is the final authority.
2. Mastering the Temperatures
- 400°F (200°C): The “Searing” Zone. Use this for steaks to build a caramelized crust without overcooking the center.
- 375°F (190°C): The “Diner” Zone. Perfect for ground beef and burgers where you want a consistent cook throughout.
- 325°F (163°C): The “Roast” Zone. Essential for larger cuts like Tri-tip to ensure the heat reaches the center before the outside is scorched.
3. The “Carry-Over” Cooking Effect
Beef continues to rise in temperature after it is removed from the air fryer. To hit your target, pull the meat when it is 5°F (3°C) lower than your desired doneness. The heat stored in the exterior will carry it to the perfect level while it rests.
4. The “Resting” Mandatory Rule
Do not slice immediately.
- Steaks: Rest for 5–10 minutes.
- Roasts (Tri-tip): Rest for 15+ minutes.
This allows the muscle fibers to relax and re-absorb the juices. If you slice too early, the juices will run out onto the board, and the meat will be dry.
Common Troubleshooting
Even with the best recipes, the air fryer can be a tricky beast when it comes to beef. If you’ve ever dealt with a smoke alarm or a gray, unappetizing steak, you aren’t alone. Here is the AirFryer Go Troubleshooting Guide to help you fix the most common beef-related issues.
1. The “Smoke Alarm” Incident
This is the #1 complaint when air frying beef, especially fattier cuts like ribeye or short ribs.
- The Cause: Excess fat drippings hit the high-heat coils, vaporizing into smoke.
- The Fix:
- The “Water Buffer”: Place 2 tablespoons of water in the bottom of your air fryer basket (below the rack). This cools the dripping fat instantly.
- The “Bread Hack”: If you are cooking something very fatty (like ribs), place a slice of bread at the bottom of the basket. It will soak up the grease like a sponge.
- Clean the Element: If your air fryer has been used recently, check for grease buildup on the heating element itself. A quick wipe-down prevents old fat from burning.
2. “My Steak is Gray, Not Brown”
You were aiming for a beautiful sear, but the steak looks like it was boiled.
- The Cause: Too much moisture on the surface or overcrowding.
- The Fix:
- Pat it Dry: Surface moisture is the enemy of the Maillard reaction. Use paper towels to make the steak bone-dry before it touches the basket.
- Preheat: Don’t skip the preheat. Your air fryer needs to be at full temp the moment the meat goes in to trigger the browning process immediately.
- Don’t Overcrowd: Air needs to circulate. If the steaks are touching, they will steam each other instead of searing.
3. “The Outside is Burnt, but the Inside is Cold”
This usually happens with thicker cuts or the “Reverse Sear” method gone wrong.
- The Cause: The temperature is set too high for the thickness of the meat.
- The Fix:
- Drop the Temp: If you are cooking a steak thicker than 1.5 inches, drop the temp to 325°F (163°C). This allows the heat to penetrate the center before the outside turns into carbon.
- Use a Probe: If your air fryer doesn’t have a probe, use an instant-read thermometer at the 10-minute mark to track progress.
4. “My Ground Beef is a Clumpy, Steamed Mess”
For recipes like tacos or pasta sauces, you want browned, crumbles, not a giant, pale puck.
- The Cause: Adding the meat in a single solid block.
- The Fix:
- The “Shake & Break”: Start by adding the beef in small, thumb-sized chunks. After 3 minutes of cooking, open the basket and use a pair of tongs to break the pieces apart further. Shaking the basket every 2 minutes ensures even heat distribution.
5. “The Steak is Tough and Chewy”
You hit the right temperature, but the texture is still difficult to eat.
- The Cause: Slicing with the grain.
- The Fix:
- The Grain Check: Before you slice, look at the muscle fibers running across the meat. You must slice perpendicular to these lines. This shortens the fibers, making the beef feel tender regardless of the cooking method.
- Resting is Mandatory: If you slice too early, the juices aren’t trapped in the muscle fibers; they are on your cutting board. Always wait 5–10 minutes.
Final Pro-Tip: When to Use Foil
Only use aluminum foil to make cleanup easier if your recipe requires it (like the ribs). Never line the entire bottom of the basket if it prevents air from flowing around the meat—this will turn your air fryer into a standard oven and you will lose that signature “fried” texture.
FAQs
1. Can I cook a frozen steak in the air fryer?
Yes, but it is not recommended for premium cuts. If you must, cook it at a lower temperature ($325^\circ\text{F}$ / $163^\circ\text{C}$) to thaw it while it cooks, then turn up the heat for the last 5 minutes to sear. Note that you will lose some of the crust quality, so always thaw your beef in the refrigerator overnight if possible.
2. Why does my air fryer smell like burning fat when cooking beef?
This is caused by fat dripping onto the heating element. To stop this, add 2 tablespoons of water to the bottom of your air fryer basket before you start. This cools the fat on contact. Also, make sure your basket is cleaned of old grease residue from previous meals.
3. Do I need to flip the beef while it’s in the air fryer?
Yes. Even with the high-velocity air circulation, flipping your steak or burger halfway through the cooking time is crucial. It ensures even heat distribution and allows both sides to develop a consistent, flavorful crust (the Maillard reaction).
4. Is it safe to use aluminum foil in the air fryer?
Yes, but use it correctly. You can use foil for “low and slow” recipes like ribs to lock in moisture, but do not block the air vents or line the bottom of the basket so completely that air cannot circulate. Always ensure the foil is weighed down by the food so it doesn’t fly up and touch the heating element, which is a fire hazard.
5. How do I get “steakhouse-quality” grill marks in an air fryer?
Air fryers cook with hot air, not direct contact with hot metal, so you won’t get traditional “char” marks. However, you can achieve a superior, uniform crust by preheating the basket, drying the meat’s surface completely, and using a light coating of high-smoke-point oil (like avocado oil).
6. Can I cook ground beef and vegetables in the air fryer at the same time?
Only if they have the same cooking time. Generally, we recommend cooking them separately. Ground beef needs to be broken up and shaken, while vegetables need a flat, stable surface. If you mix them, the grease from the beef will prevent your vegetables from getting crispy.
7. How long should I rest my beef after air frying?
Resting is non-negotiable. For a single steak, let it rest for at least 5–10 minutes. For larger roasts like Tri-tip, rest for 15 minutes. This allows the muscle fibers to relax and re-absorb the juices, ensuring every bite is tender and moist.
Conclusion
Cooking beef in an air fryer is no longer a guessing game. By mastering the balance between high-heat searing and precise internal temperature monitoring, you can turn even the toughest cuts into restaurant-quality masterpieces right in your own kitchen. Whether it’s a perfectly crusted Filet Mignon for a special date night or a quick batch of juicy burgers for the family, you now have the professional techniques to achieve consistent, delicious results every single time.
At AirFryer Go, our mission is to remove the stress from your cooking routine. We believe that with the right data and a few pro-hacks—like the “Water Buffer” for smoke control or the “Against-the-Grain” slicing method—everyone can become a confident air fryer chef.
Ready to level up your culinary game?
- Share your results: Did you nail that Medium-Rare steak today? Post a photo and tag us in the comments below—we love seeing your creations!
- Keep exploring: Dive into our other guides, such as [The Ultimate Air Fryer Vegetable Cheat Sheet] or [10-Minute Air Fryer Side Dishes], to complete your meal.
- Stay connected: Don’t forget to subscribe to the AirFryer Go newsletter for weekly expert tips, exclusive recipe drops, and troubleshooting hacks delivered straight to your inbox.
Happy frying, and here’s to many more tender, juicy, and stress-free beef dinners!
Recommended next reads:
25+ Air Fryer Chicken Recipes: Crispy, Juicy and Foolproof