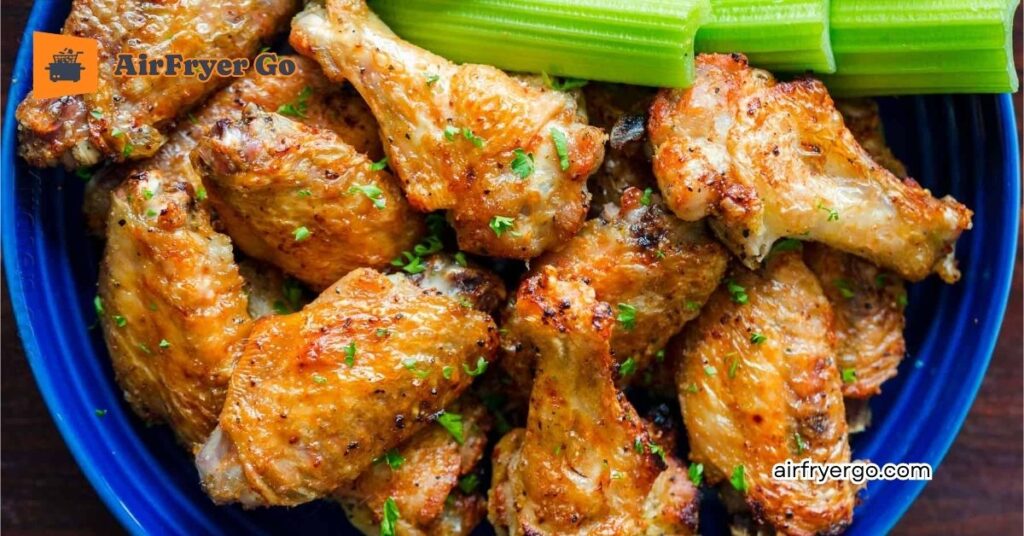
Achieving the perfect air fryer crispy wings is often the “final boss” for home cooks—a challenge where the difference between a soggy disappointment and a golden masterpiece lies in the details. At AirFryer Go, we know you aren’t just looking for a snack; you’re looking for that signature, shatter-crisp snap that rivals your favorite wing spot, all without the mess of a deep fryer.
In this guide, we’re moving past basic instructions to share the exact science of the “crunch,” including why a common pantry staple might be the secret ingredient you’ve been missing.
>>> Read More: The Ultimate Air Fryer Recipe Index: 101+ Easy & Healthy Ideas for Every Meal
Ingredients: What You’ll Need
To get those legendary air fryer crispy wings, the secret isn’t just the machine—it’s the chemistry of your coating. At AirFryer Go, we’ve narrowed down the essential components that transform raw chicken wings air fryer style from average to extraordinary.
Here is exactly what you’ll need to gather before you start.
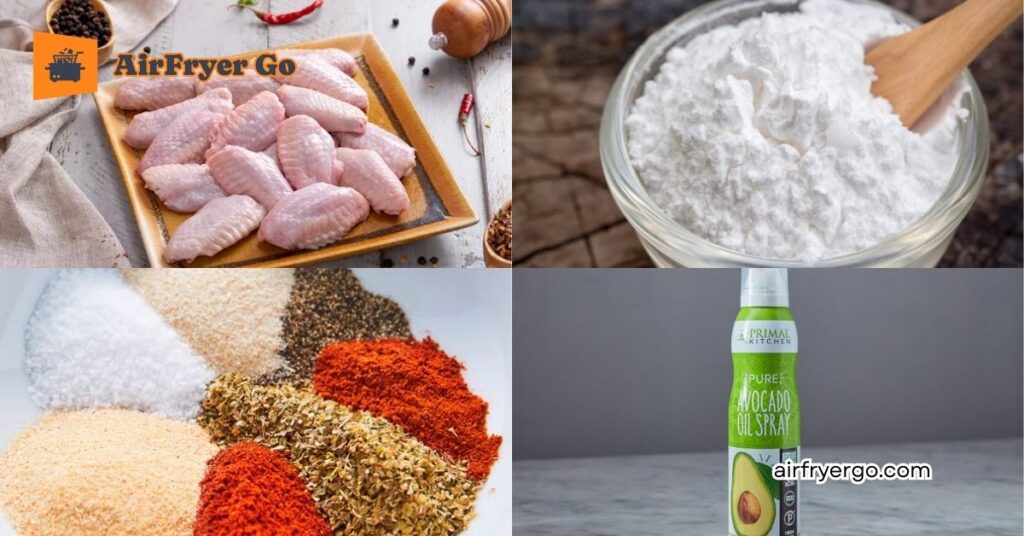
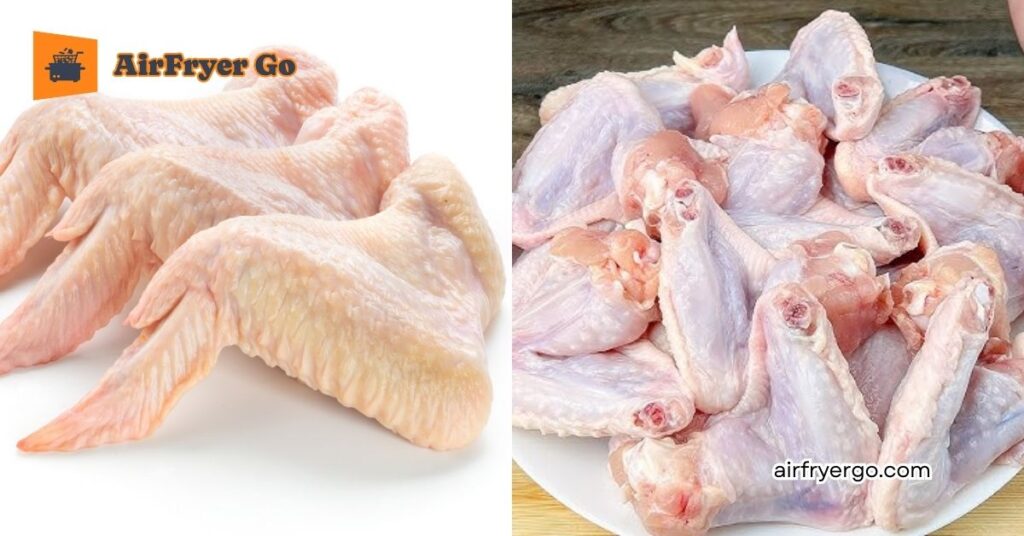
1. The Protein
- 1 to 2 lbs Raw Chicken Wings: You can use split wings (flats and drums) or air fryer whole wings.
- AirFryer Go Tip: If using whole wings in air fryer recipes, ensure they are fully thawed. Frozen centers are the number 1 cause of rubbery skin.
2. The “Crunch” Agents (Pick Your Texture)
This is where the magic happens. We’ve tested three variations, and here is how they perform:
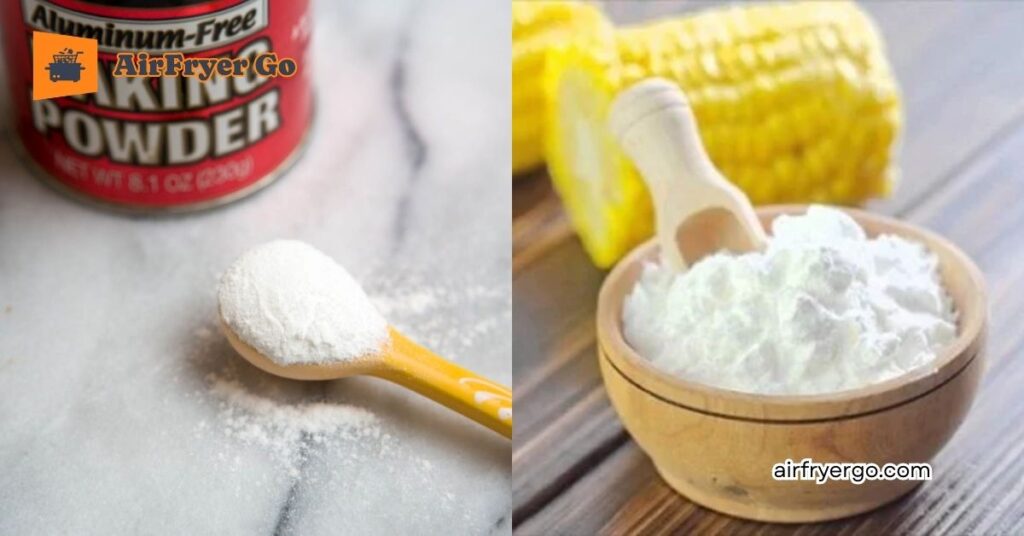
- Baking Powder (1 tbsp): Our top recommendation. It breaks down the proteins in the skin and creates tiny carbon dioxide bubbles for a “shatter-crisp” finish.
- Note: Ensure it is aluminum-free to avoid a metallic aftertaste.
- Cornstarch (1 tbsp): Excellent for a smooth, hard crunch. It absorbs moisture better than flour.
- The Hybrid (Best Results): Mix 1/2 tbsp of baking powder with 1/2 tbsp of cornstarch.
3. The AirFryer Go Signature Seasoning
Avoid “wet” marinades, which cause steaming instead of frying. Stick to this dry air fryer chicken wings seasoning for maximum flavor:
- 1 tsp Salt: Essential for drawing out moisture.
- 1 tsp Garlic Powder: For that savory, classic aroma.
- 1 tsp Smoked Paprika: Adds a beautiful golden-red hue without the heat.
- 1/2 tsp Black Pepper: For a gentle bite.
- Optional: A pinch of cayenne or onion powder for extra depth.
4. The “Finishing” Touch
- High-Smoke Point Oil Spray: (Avocado or Grapeseed oil). A light spritz halfway through helps eliminate any dry “floury” spots on the skin.
Why No Flour?
You might notice we didn’t list a heavy batter. While air fryer chicken wings with flour are possible, flour tends to become “cakey” or gummy in an air fryer because there isn’t enough oil to fry the grains. At AirFryer Go, we find that air fryer chicken wings cornstarch or baking powder versions produce a much cleaner, more professional crunch.
Crucial Prep Reminder: Before you add a single spice, grab some paper towels. You must pat your wings until they are bone-dry. Any surface moisture will turn into steam, and steam is the enemy of the crunch.
The Science of the Crunch: Baking Powder vs. Cornstarch
At AirFryer Go, we believe that cooking is a precise science. To achieve that signature “shatter-crisp” texture, you need to understand why baking powder transforms chicken skin in a way that flour or cornstarch simply cannot match.
Here is the chemical breakdown of how these ingredients behave under the intense airflow of your air fryer:
1. The Alkaline Magic of Baking Powder
Baking powder is the ultimate “crunch hack” for air frying. It works by raising the pH level of the chicken skin, which leads to two critical reactions:
- Protein Breakdown: The higher pH helps break down the peptide bonds in the skin more efficiently, allowing it to crisp up faster and become thinner.
- CO2 Bubbles: As the wings heat up, the baking powder creates thousands of tiny carbon dioxide bubbles. This increases the surface area of the skin, creating a textured, bubbly crust that feels light and airy rather than hard and heavy.
2. The Moisture Shield of Cornstarch
If you prefer a smoother, more solid crunch, cornstarch is your best ally.
- Superior Absorption: Cornstarch is highly effective at absorbing any residual moisture that your paper towel missed. Since steam is the enemy of crispiness, removing this moisture is vital.
- The “Glass” Effect: While baking powder creates bubbles, cornstarch forms a thin, starch-based film that hardens into a crisp, golden shell.
3. Why Traditional Flour Often Fails
Many people wonder why they shouldn’t just use all-purpose flour like they would for deep-frying. The reason comes down to the volume of oil.
- The Oil Gap: In a deep fryer, the flour is instantly submerged in boiling oil, which fries the grains. In an air fryer, there isn’t enough fat to saturate the flour, often resulting in wings that look white, taste “dusty,” or feel gummy.
The AirFryer Go Crunch Scorecard
| Coating Agent | Crunch Level | Best Texture For… |
| All-Purpose Flour | 4/10 | Country-fried style (often dull in air fryers) |
| Cornstarch | 8/10 | Hard, smooth, and reliable snap |
| Baking Powder | 10/10 | Professional, bubbly, and incredibly light crisp |
Expert Tip: Always ensure you are using aluminum-free baking powder. Standard baking powder can leave a bitter, metallic aftertaste when used in the quantities required for coating wings. A 50/50 blend of baking powder and cornstarch is the “Goldilocks” ratio we recommend at AirFryer Go for the perfect balance of hardness and airiness.
Step-by-Step Guide: From Raw to Radiant
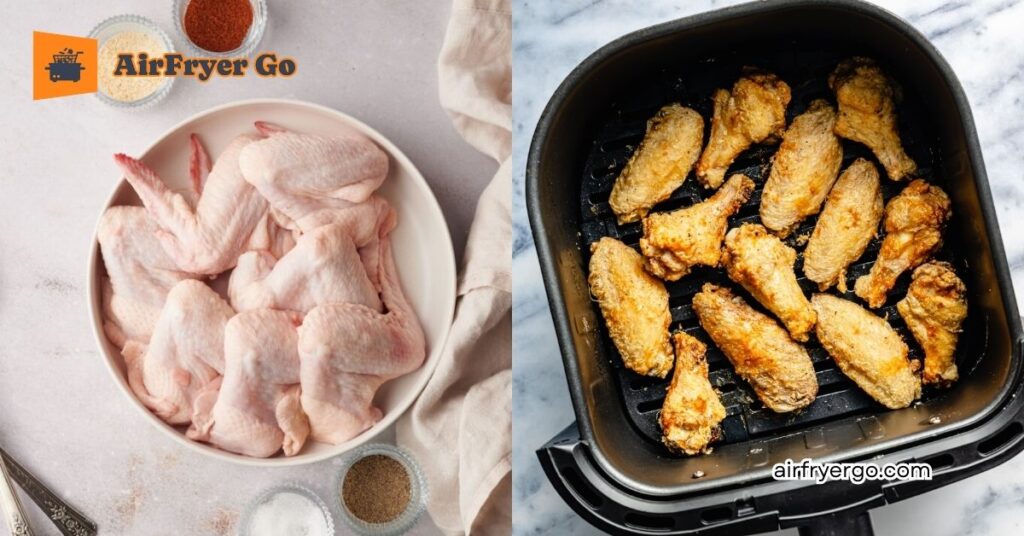
Cooking is all about technique. To transform raw chicken wings air fryer style into a golden masterpiece, you need more than just heat; you need a process. At AirFryer Go, we’ve perfected this four-step method to ensure your wings are never soggy and always “radiant.”
Step 1: The Great Dry-Down
Moisture is the absolute enemy of the crunch. If your wings are even slightly damp, they will steam instead of fry.
- Action: Remove your wings from the packaging and pat them dry with paper towels.
- The Pro Move: If you have time, place the naked wings on a rack in the fridge for 30 to 60 minutes. This “air-dries” the skin, making it much easier to achieve that shatter-crisp texture.
Step 2: The Seasoning Toss
Once bone-dry, it’s time to apply your air fryer chicken wings seasoning and your choice of crunch agent (baking powder or cornstarch).
- Action: Place wings in a large bowl. Sprinkle your dry rub and baking powder/cornstarch mixture over them.
- The Technique: Toss vigorously until every nook and cranny is coated. The wings should look slightly dusty, not caked in white powder.
Step 3: The “No-Crowd” Arrangement
How you place air fryer whole wings or flats in the basket determines if they crisp or clump.
- Action: Lay the wings in a single layer. Ensure there is at least a half-inch of space between each wing.
- Why it matters: Air fryers rely on a high-velocity “vortex” of air. If the wings touch, the air can’t reach the sides, resulting in soft, pale spots.
Step 4: The Two-Stage Cook
We recommend a two-temperature approach to mimic professional deep-frying.
- Stage 1 (Rendering): Set your air fryer to 360°F for 12 minutes. This melts the fat under the skin slowly without burning the outside.
- The Flip & Spritz: Open the basket, flip the wings, and give any “dry/white” spots a tiny spritz of avocado oil.
- Stage 2 (The Crisp): Increase the heat to 400°F for 6 to 10 minutes. This final “blast” turns the rendered skin into a golden, bubbly crust.
Timing for Different Cuts
| Cut Type | Total Time (Approx.) | AirFryer Go Advice |
| Split Wings (Drums/Flats) | 18 – 22 Minutes | Shake the basket halfway through. |
| Air Fryer Whole Wings | 22 – 28 Minutes | Use tongs to flip carefully; tuck the tips. |
| Frozen Wings | 28 – 35 Minutes | Thaw first for best results; otherwise, add 10 mins. |
The AirFryer Go “Doneness” Check: Your wings are ready when they reach an internal temperature of 165°F (74°C). However, for wings, we actually prefer taking them to 175°F—the extra few degrees helps break down the connective tissue, making the meat fall off the bone while the skin stays ultra-crispy.
Handling Different Cuts: Whole Wings vs. Flats & Drums
Not all chicken wings are created equal. Whether you are dealing with a bag of party wings or a tray of air fryer whole wings, the way you prep and position them in the basket will determine if they reach that “radiant” status we strive for at AirFryer Go.
Understanding the difference between air fryer and toaster oven airflow is key here: because the air fryer is a compact “wind tunnel,” the shape of the cut changes how the heat circulates.
1. Flats and Drums (Split Wings)
These are the most common cuts found in grocery stores. They are easy to manage but require a bit of “space management.”
- The Technique: Because flats and drums have a high surface-area-to-meat ratio, they crisp up the fastest.
- The AirFryer Go Tip: Arrange them like a “sunburst” pattern along the edges of the basket. The air in most fryers hits the edges hardest before swirling into the center.
- Cook Time: Usually 18-22 minutes at the two-stage temperature method.
>>> Read More: The Ultimate Air Fryer Temps & Times Masterclass
2. Air Fryer Whole Wings
Whole wings include the drumette, the flat, and the wing tip all attached. Many enthusiasts prefer whole wings in air fryer recipes because they stay juicier, but they require a little extra “triage.”
- The “Tuck” Trick: To prevent the thin wing tips from burning before the thick drumette is cooked, tuck the tip behind the drumette (forming a little triangle). This protects the delicate end from the direct blast of the heating element.
- The Flip: Unlike split wings, which you can just shake, you should use tongs to manually flip each of your air fryer whole wings. This ensures the underside of the “flat” section doesn’t stay soggy.
- Cook Time: Expect these to take 22-28 minutes. They need that extra time to render the fat in the joints.
Comparison: Which Cut is Right for You?
| Feature | Flats & Drums (Party Wings) | Whole Wings |
| Prep Time | Zero (usually pre-split) | Low (requires “tucking”) |
| Cook Speed | Fast | Slower (+5-8 mins) |
| Juiciness | Standard | High (fat is trapped in joints) |
| Crunch Factor | Extreme (lots of skin exposure) | Moderate to High |
AirFryer Go Pro-Tip: If you are cooking raw chicken wings air fryer style and you have a mix of both cuts, put the whole wings in 5 minutes before the flats and drums. This ensures everything finishes at the exact same moment of golden-brown perfection.
Pro-Tips for “Fried” Texture (Without the Oil)
To get that authentic, bubbly “deep-fried” look using only hot air, you need to trick the chicken skin into behaving like it’s in a vat of oil. At AirFryer Go, we’ve mastered the small tweaks that bridge the gap between “baked chicken” and “fried perfection.”
Here are our top insider secrets for achieving that legendary texture without the heavy grease.
1. The “Ghost of Oil” Spritz
While we want to avoid deep-frying, a tiny amount of oil is actually a catalyst for the crunch. If you use air fryer chicken wings cornstarch or baking powder, you might see white, dusty spots after 10 minutes of cooking.
- The Fix: Use a high-smoke point oil mister (like avocado or light olive oil). At the halfway mark, give those white spots a very light “spritz.” This hydrates the starch, allowing it to fry in the chicken’s own rendered fat, turning it golden-brown and crispy.
2. The Room Temperature Start
Taking raw chicken wings air fryer style straight from a 38°F refrigerator to a 400°F basket causes the meat to seize and the skin to stay “shocked” and chewy.
- The Fix: Let your seasoned wings sit on the counter for 15 to 20 minutes before cooking. Taking the chill off allows the fat to render immediately once it hits the heat, leading to a much better “fried” snap.
3. The “Steam Release” Strategy
The biggest enemy of a fried texture is steam. If your air fryer is pushed right up against a wall or underneath a low cabinet, the moisture it exhausts can linger near the intake, making the air “wet.”
- The Fix: Pull your air fryer out into an open space with plenty of ventilation. At AirFryer Go, we also suggest cracking the basket open for just 5 seconds every 10 minutes to let the built-up steam escape.
4. Don’t Fear the High Heat
Many people stop at 375°F because they are afraid of burning the seasoning. However, you need that final blast of heat to achieve the “shatter-crisp” effect.
- The Fix: Always finish your wings at 400°F. This creates a “flash-fry” effect that tightens the skin and creates those tiny, crispy bubbles we love.
AirFryer Go Texture Checklist
- Parchment Paper? Only if it’s perforated. Solid paper blocks airflow and leads to soggy bottoms.
- Aerosol Sprays? Never. They contain additives that create a sticky film on the basket and a “chemical” texture on the wings.
- The Shake? For flats and drums, a vigorous shake every 7 minutes redistributes the rendered fat, effectively “basting” the wings as they cook.
The Golden Rule: If it sounds like a hollow “thwack” when you tap the wing with tongs, it’s ready. If it sounds soft or muted, give it 3 more minutes at 400°F.
Troubleshooting: Why aren’t my wings crispy?
It can be incredibly frustrating to follow a recipe only to pull out wings that are pale, rubbery, or “steamed” instead of fried. At AirFryer Go, we’ve identified the four most common culprits that kill the crunch.
If your wings didn’t come out with that signature snap, here is exactly what went wrong and how to fix it for next time.
1. The “Wet Wing” Syndrome
- The Problem: You took your raw chicken wings air fryer style straight from the package to the basket without a thorough dry-down.
- The Result: The heat has to evaporate the surface water before it can start crisping the skin. By the time the water is gone, the meat is overcooked and the skin is soggy.
- The Fix: Use at least three paper towels per pound of wings. Pat them until the paper towel comes away completely dry. For a professional level, let them air-dry in the fridge for an hour.
2. The “Overcrowding” Trap
- The Problem: You tried to cook two pounds of wings in a small basket by stacking them on top of each other.
- The Result: Air fryers are convection machines. If the “vortex” of hot air cannot reach every millimeter of the skin, the wings will simply “sweat” against each other.
- The Fix: Cook in batches. It is better to eat 10 perfect wings now and 10 more in fifteen minutes than to eat 20 soggy wings at once. Space = Airflow = Crunch.
3. The “Baking Powder vs. Soda” Blunder
- The Problem: You used baking soda instead of baking powder, or you used too much of it.
- The Result: Baking soda has a strong metallic, bitter taste and won’t create the same CO2 bubbles as powder. If you used the right powder but too much of it, it can create a “chalky” film that never quite crisps up.
- The Fix: Double-check your labels! Always use Baking Powder (aluminum-free is best). Stick to the ratio of 1 tablespoon per pound of wings.
4. The “Under-rendering” Issue
- The Problem: You cooked the wings at 400°F for the entire duration.
- The Result: The outside browned too quickly, but the fat underneath the skin didn’t have time to melt (render). This leaves a layer of soft, rubbery fat between the meat and the skin.
- The Fix: Use the AirFryer Go Two-Stage Method. Start at 360°F to melt the fat, then crank it to 400°F to “flash-fry” the skin.
AirFryer Go Quick-Fix Checklist
| Symptom | Likely Cause | Solution |
| Soggy Bottoms | No airflow underneath | Don’t use solid foil; flip wings halfway. |
| White Dusty Spots | Dry starch build-up | Lightly spritz with oil mister halfway. |
| Burned Tips | Exposed air fryer whole wings | Tuck the wing tips under the drumette. |
| Tough/Dry Meat | Overcooked | Use a meat thermometer; pull at 175°F. |
The AirFryer Go Final Check: Did you use a “wet” marinade with honey or sugar? Sugary sauces burn at high heat before the skin can get crispy. Always air fry with a dry rub first, then toss in your favorite sauce after they are cooked.
AirFryer Go’s Signature Dipping Sauces
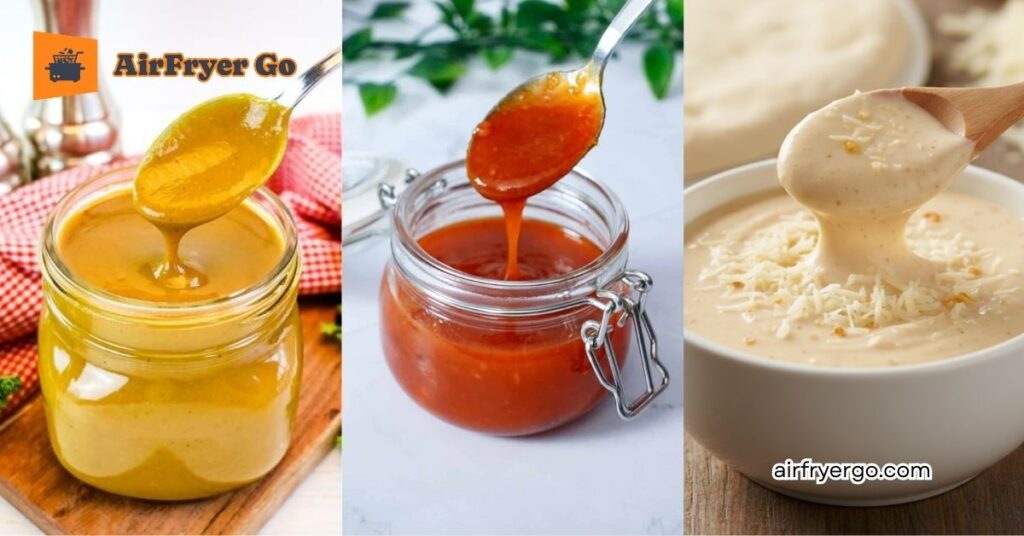
Once you’ve achieved that perfect, shatter-crisp texture, the final step is the flavor “toss.” At AirFryer Go, we believe the sauce should complement the crunch, not drown it. To keep your wings from getting soggy, always toss them in these sauces in a large bowl immediately before serving.
Here are our three favorite house-made sauces designed specifically for air-fried wings.
1. The Classic “Gold Standard” Buffalo
This is the traditional pairing for air fryer crispy wings. The vinegar in the sauce cuts through the richness of the rendered chicken fat perfectly.
- The Mix: 1/2 cup Frank’s RedHot (or any cayenne pepper sauce) + 1/4 cup melted unsalted butter + 1/2 tsp Worcestershire sauce.
- The Pro Move: Whisk in a pinch of garlic powder while the butter is warm to help the sauce emulsify and cling to the “nooks and crannies” of the skin.
2. Sticky Honey-Sriracha (Sweet & Heat)
If you used air fryer chicken wings cornstarch as your coating, this thicker sauce is for you. The starch creates a “glassy” surface that handles sticky glazes beautifully.
- The Mix: 1/4 cup honey + 2 tbsp Sriracha + 1 tbsp soy sauce + 1 tsp lime juice.
- The Pro Move: Warm this sauce in a small saucepan for 2 minutes before tossing. The heat thins the honey just enough to coat the wings thinly, preventing them from becoming heavy.
3. Creamy Garlic Parmesan (The Dry-Wet Hybrid)
Ideal for those who want a savory, “umami” punch without the heat of chili peppers.
- The Mix: 1/4 cup high-quality mayonnaise + 1/4 cup grated Parmesan cheese + 2 cloves minced garlic + 1 tsp dried parsley.
- The Pro Move: Add a squeeze of fresh lemon juice. The acid brightens the garlic and makes the Parmesan flavor “pop” against the salty seasoning.
To ensure your air fryer whole wings or flats stay crunchy even after saucing:
- Warm the Sauce: Cold sauce on hot wings creates instant steam, which softens the skin.
- The “Light Coat” Rule: Use a large bowl. Pour the sauce around the edges of the bowl, not directly onto the wings.
- The Toss: Toss quickly for 10 seconds. You want a thin, translucent glaze, not a heavy bath.
Sauce Matchmaker Table
| If you like… | Go with… | Why? |
| Traditional Heat | The Gold Standard | The classic pairing that never fails. |
| Asian-Inspired Fusion | Honey-Sriracha | Great for “whole wings” with lots of surface area. |
| Rich & Savory | Garlic Parmesan | Kids love it; no spice, all flavor. |
AirFryer Go Final Thought: If you took the time to make your wings extra crispy, consider serving the sauce on the side for dipping. This allows every single bite to stay “shatter-crisp” from the first wing to the last.
FAQs
1. Can I use frozen wings instead of raw ones?
Yes, but for the best results, we recommend thawing them first. If you cook from frozen, the outside will often brown before the inside is fully rendered. If you must cook from frozen, add 8 to 10 minutes to the total cook time and ensure you shake the basket frequently to break up any ice clumps.
2. Why do my wings have white, dusty spots?
This usually happens when you use air fryer chicken wings cornstarch or baking powder and don’t use any oil. The starch needs a tiny bit of fat to “activate” and turn golden.
- The Fix: Give the wings a very light spritz of oil mister halfway through the cooking process once the skin looks dry.
3. Is baking powder really safe to use on chicken?
Absolutely! When used in small amounts (about 1 tablespoon per pound), it is a culinary secret for changing the pH of the skin. Just ensure you use aluminum-free baking powder to avoid a bitter, metallic taste. At AirFryer Go, this is our number 1 secret for professional-grade results.
4. How many wings can I cook at once?
This depends on your basket size, but the rule of thumb is never stack them. A single layer with space for air to circulate is mandatory. If you are cooking air fryer whole wings, you will likely only fit 4 to 6 per batch. For split wings, you can usually fit 10 to 12.
5. Can I use a wet marinade instead of a dry rub?
We don’t recommend it if you want “crispy” wings. Wet marinades create steam in the air fryer, which leads to rubbery skin. For the best air fryer chicken wings seasoning results, use a dry rub during the cook and toss the wings in your favorite wet sauce after they are finished.
6. Why are my wings smoking in the air fryer?
Chicken wings are high in fat. As the fat renders and drips onto the bottom of the pan, it can smoke.
- The Fix: Place a slice of bread or a tablespoon of water in the bottom drawer (underneath the basket) to catch and cool the drippings, preventing them from burning.
Conclusion: Your New Friday Night Tradition
Mastering the perfect air fryer crispy wings is more than just following a recipe—it’s about reclaiming your Friday nights with a meal that is faster, healthier, and arguably better than any takeout. By understanding the science of the crunch and respecting the power of airflow, you’ve turned a simple kitchen appliance into a gourmet tool.
At AirFryer Go, our mission is to help you bridge the gap between “good enough” and “perfection.” We hope this guide empowers you to ditch the deep fryer for good and start a new tradition of shatter-crisp, golden-brown excellence right in your own kitchen. Now, grab your favorite sauce, clear the table, and enjoy the fruits of your labor. Happy air frying!
Recommended next reads:
The Best Damn Air Fryer Salmon: Crispy & Juicy Every Time
Juicy Air Fryer Pork Chops: The Ultimate Guide
Homemade Air Fryer Pizza: A Delicious and Easy Way to Satisfy Your Cravings