Mastering air fryer chicken recipes at home should be a breeze, yet if you have ever struggled with dry, rubbery breasts or skin that refuses to crisp up, you are not alone. Stop settling for subpar results; at AirFryer Go, we have stress-tested hundreds of batches to crack the code for the perfect, golden-brown finish every single time.
From preparing a succulent whole spatchcock chicken to achieving restaurant-quality crunch on frozen tenders, this guide is designed to help you transform your air fryer into your kitchen’s most reliable tool. Let’s get cooking and turn your next chicken dinner into a total success.
>>> Read More: The Ultimate Air Fryer Recipe Index: 101+ Easy & Healthy Ideas for Every Meal
The Science of Crispy & Juicy
To achieve restaurant-quality results, you must master the fundamental physics inside your air fryer basket. Achieving the “Golden Ratio”—a shatter-crisp exterior combined with a succulent, juicy interior—is not just luck; it is a matter of moisture control and heat distribution.
1. The Moisture Paradox: Surface vs. Interior
The greatest enemy of crispy skin is surface moisture. When you place chicken in the air fryer, the appliance acts like a high-speed convection oven, circulating superheated air. If the surface of the chicken is wet, that energy is first used to evaporate the water, steaming the skin rather than searing it. This leads to that dreaded “rubbery” texture.
- The Pro-Step: Always pat your chicken completely dry with paper towels before seasoning.
- The Secret Additive: For maximum crispness, toss your chicken with a light dusting of baking powder (not baking soda) or cornstarch. These additives alter the surface pH and draw out moisture, facilitating the Maillard reaction—the chemical process that creates flavor and a golden-brown crust.
2. The Maillard Reaction & Temperature
The Maillard reaction is a chemical reaction between amino acids and reducing sugars that occurs when food is heated to temperatures above 285 degrees F (140 degrees C). In an air fryer, this happens rapidly.
- The Golden Zone: Most chicken recipes thrive between 375 degrees F and 400 degrees F (190 degrees C to 200 degrees C). Anything lower than this will result in pale, soft skin; anything higher for a prolonged period will burn the surface before the interior is safely cooked.
3. Convection Heat and Airflow
The “Air” in Air Fryer is the secret to its efficiency. The fan forces hot air into the basket, creating a turbulent environment that accelerates heat transfer.
- Avoid Overcrowding: If you stack pieces of chicken, you create “dead zones” where air cannot circulate. The result is uneven cooking—some parts will be dry and overcooked, while others will be dangerously undercooked. Ensure there is enough space between pieces for the air to flow freely.
- The Flip Factor: Because air flows from top to bottom, the bottom of the chicken will never be as crisp as the top unless you flip it halfway through the cooking time.
4. Preserving the Juices
The interior juiciness depends on two factors: Temperature control and carry-over cooking.
- Internal Temperature: Always aim to remove your chicken when the internal temperature hits 160 degrees F (71 degrees C) for breasts or 170 degrees F to 175 degrees F (77 degrees C to 79 degrees C) for thighs.
- The Resting Period: Never cut into your chicken immediately. Resting for 5 to 10 minutes allows the muscle fibers to reabsorb the juices that were pushed to the center during the rapid heating process. If you cut it too soon, those juices will run out onto your cutting board, leaving you with dry meat.
The “Perfect” Air Fryer Chicken Breast
This section is designed to turn the “dreaded dry breast” into a highlight of your meal prep. By using the 160 degrees F (71 degrees C) pull-out rule and a consistent base method, you will achieve perfect results every time.
The Master Base Method (For all recipes below)
- Pat Dry: Remove all moisture from the surface.
- Season: Apply a light coat of avocado or olive oil, followed by your dry rub.
- The Cook: Preheat your air fryer to 375 degrees F (190 degrees C).
- Time: Cook for 15 to 18 minutes, flipping halfway through.
- Rest: Allow the chicken to sit for 5 minutes before slicing.
7 Ways to Flavor Your “Perfect” Chicken Breast
| Recipe Style | Key Ingredients | Pro Tip |
| 1. Garlic Herb Butter | Minced garlic, melted butter, dried rosemary, parsley. | Brush the butter mixture on during the last 3 minutes to avoid burning the garlic. |
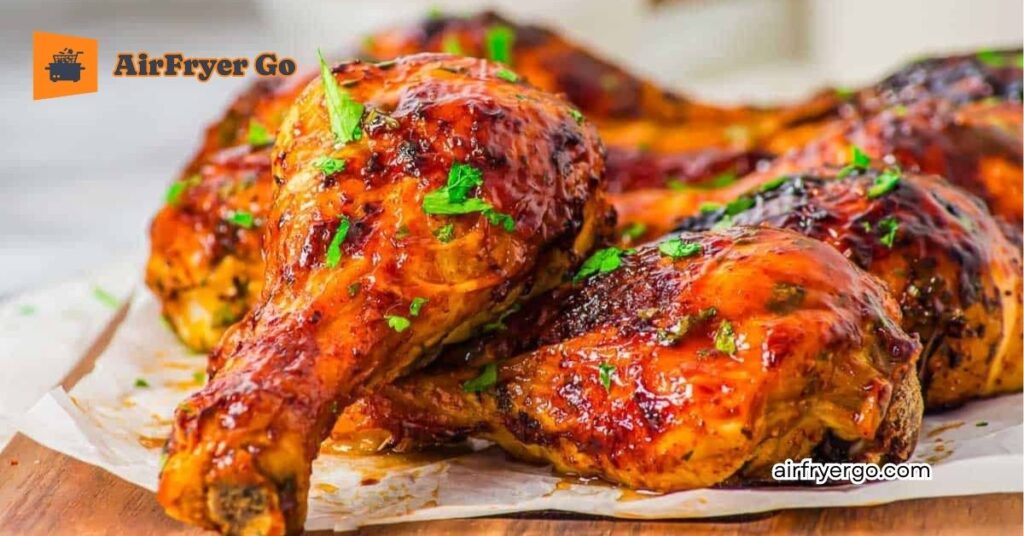
| 2. Sweet BBQ Glaze | Brown sugar, paprika, chili powder, garlic powder. | Add your favorite BBQ sauce only in the last 2 minutes to prevent the sugar from charring. |
| 3. Buffalo Kick | Buffalo sauce, melted butter, garlic powder. | Serve with a side of blue cheese or ranch for an authentic wing-shop experience. |
| 4. Teriyaki Glaze | Soy sauce, honey, ginger, sesame oil. | Use low-sodium soy sauce to control the saltiness of the glaze. |
| 5. Lemon Pepper Zest | Fresh lemon juice, lemon zest, cracked black pepper. | Add the lemon zest right after cooking to keep the aroma bright and fresh. |
| 6. Spinach-Stuffed | Cream cheese, chopped spinach, parmesan. | Use a sharp knife to cut a pocket into the side. Secure with toothpicks if needed. |
| 7. Thinly Sliced | Olive oil, Italian seasoning, garlic salt. | Slice the breast into 1/2 inch strips. Cook at 400 degrees F (200 degrees C) for only 8 to 10 minutes. |
Pro-Tips for you
- The “Stuffed” Safety Check: When cooking stuffed breasts, always ensure your thermometer is inserted into the thickest part of the meat, not just the filling. The filling heats up faster than the chicken.
- Why Thinly Sliced? For busy weeknights, thinly sliced chicken breast is the ultimate time-saver. Because it cooks in under 10 minutes, it retains significantly more natural juices than a thick, whole breast that spends 20+ minutes in the air fryer.
- Consistency is Key: If you buy “value packs” of chicken breasts, they are often uneven in thickness. Use a meat mallet to pound them to an even thickness before cooking. This simple step prevents the “one side dry, one side raw” disaster.
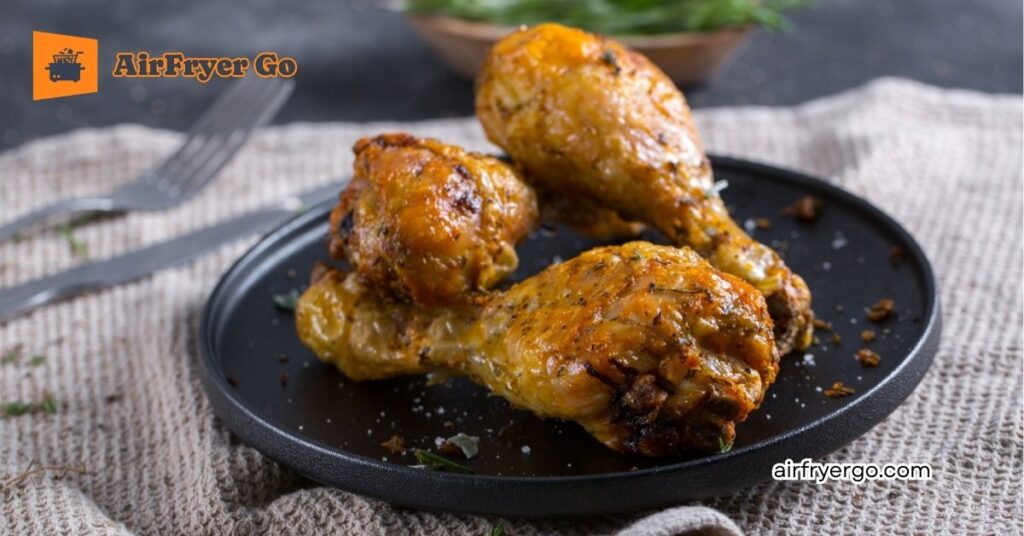
Chicken Thighs & Drumsticks
This section focuses on the rich, forgiving nature of dark meat. Unlike breasts, thighs and drumsticks contain higher fat content and connective tissue, making them the ultimate “fail-proof” candidates for high-heat air frying.
The Master Base Method (For all recipes below)
- Pat Dry: Moisture is the enemy of crisp skin. Dry thoroughly with paper towels.
- Season: Always apply a dry rub first to create the flavor foundation.
- The Cook: Preheat to 380 degrees F (193 degrees C).
- Time: * Bone-in/Skin-on: 22–25 minutes.
- Boneless/Skinless: 12–15 minutes.
- Pro tip: Always flip halfway to ensure even rendering of fat.
- The Finish: Target an internal temp of 175 degrees F (79 degrees C).
7 Ways to Flavor Your Chicken Thighs & Drumsticks
| Recipe Style | Key Ingredients | Pro Tip |
| 1. Classic BBQ | Smoked paprika, brown sugar, garlic powder. | Add BBQ sauce in the final 3 minutes to avoid burnt sugar. |
| 2. Sticky Gochujang | Gochujang paste, honey, sesame oil. | This spicy-sweet glaze caramelizes perfectly in the air fryer. |
| 3. Honey Garlic | Minced garlic, honey, melted butter. | Brush on near the end for a high-gloss, sticky finish. |
| 4. Lemon Pepper | Lemon zest, cracked black pepper, olive oil. | Keep it simple; the zest provides a bright “pop” that cuts through the fat. |
| 5. Asian Teriyaki | Soy sauce, ginger, mirin, brown sugar. | Use low-sodium soy sauce to prevent the glaze from getting too salty. |
| 6. Crispy Dry Rub | Chili powder, cumin, onion powder, paprika. | Apply a very light mist of oil to help the spices “bloom” on the skin. |
| 7. Garlic Herb | Rosemary, thyme, minced garlic, sea salt. | Use fresh herbs; the intense air circulation in the fryer infuses the aroma deeply. |
Tips for Perfect Thighs & Drumsticks
- The “Water Hack” for Smoke: If you are cooking fatty skin-on thighs, the dripping grease can sometimes cause smoking. Add 2 tablespoons of water to the base of the basket (below the tray) to prevent this grease from burning.
- Why the Higher Temp? While breasts dry out, dark meat thrives at 175 degrees F (79 degrees C). The extra heat allows the collagen in the thighs and drums to break down, resulting in meat that literally falls off the bone.
- The “Tug” Test: When cooking drumsticks, the meat should naturally “pull back” from the bone end. If the meat is still tight against the bone, it needs 2–3 more minutes.
- Bone-in Advantage: Never worry about overcooking bone-in thighs slightly. The bone acts as a heat sink, providing a buffer that keeps the meat moist even if you leave it in for an extra minute or two.
Whole Chicken & Spatchcock
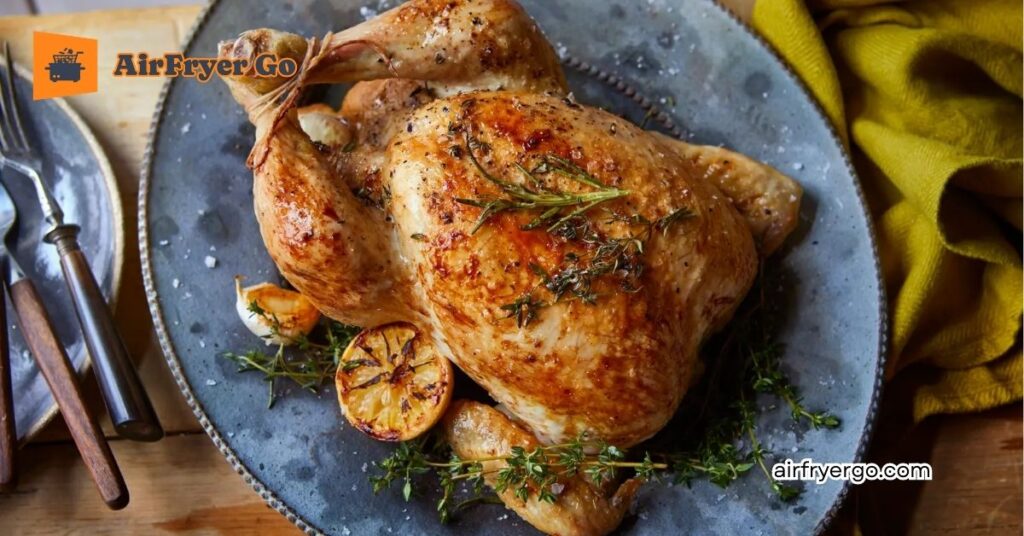
This section is the “showstopper” of air frying. Cooking a whole bird can be intimidating, but with the spatchcock (butterfly) method, you increase the surface area exposed to heat, resulting in a perfectly cooked bird with crispy skin and juicy meat in half the time of a traditional oven.
The Master Base Method (Spatchcocking)
- The Prep: Use kitchen shears to cut along both sides of the backbone and remove it. Lay the chicken flat, skin-side up, and press down firmly on the breastbone until it “cracks” and lays flat.
- Season: Pat dry thoroughly. Apply a generous amount of oil or melted butter under and over the skin, then apply your rub.
- The Cook: Preheat to 360 degrees F (182 degrees C).
- Time: 45 to 55 minutes, depending on the weight of the bird.
- The Finish: The thickest part of the breast should reach 165 degrees F (74 degrees C).
7 Ways to Flavor Your Whole Chicken
| Recipe Style | Key Ingredients | Pro Tip |
| 1. Classic Herb Butter | Salted butter, fresh thyme, rosemary, garlic. | Push the butter under the skin of the breast for maximum moisture. |
| 2. Lemon Garlic Roast | Whole lemon (halved), garlic cloves, black pepper. | Place lemon slices underneath the bird to infuse flavor from below. |
| 3. Smoky BBQ Rub | Smoked paprika, brown sugar, chili powder. | The sugar caramelizes into a deep mahogany bark in the air fryer. |
| 4. Garlic Parmesan | Minced garlic, grated parmesan, parsley. | Add the parmesan during the last 10 minutes to prevent the cheese from burning. |
| 5. Mediterranean Spice | Za’atar, olive oil, lemon zest. | The heat of the fryer makes the sesame seeds in the za’atar incredibly fragrant. |
| 6. Sweet Honey Glaze | Honey, soy sauce, ginger, onion powder. | Brush with the glaze every 15 minutes during the final half of cooking. |
| 7. Spicy Cajun Style | Cajun seasoning, garlic powder, onion powder. | Mix the seasoning with softened butter and rub it all over for a bold kick. |
Tips for Whole Chicken
- The “Ninja Foodi” Advantage: If you are using a model with a pressure cooker function, “pressure cook” the bird for 15 minutes first to lock in juices, then “air crisp” for 20 minutes to get the skin gold.
- Why Spatchcock? A whole, round chicken in an air fryer often burns the top skin before the legs are done. Flattening the bird makes the height uniform, ensuring the breast and thighs finish at the same time.
- The Resting Rule: This is non-negotiable for whole birds. You must let the chicken rest for 15 minutes before carving. If you cut into it too soon, the juices will run out, and the meat will be dry.
- Check the Fit: Before you start seasoning, place your chicken in the basket. If it’s too large, don’t force it. Use your shears to trim the wing tips or even cut the legs off if the basket is significantly smaller than the bird.
The “Busy Parent” Hack (Frozen & Pre-packaged)
This section is the ultimate “emergency dinner” toolkit. For busy parents, the air fryer isn’t just a kitchen appliance—it’s a time machine. Using frozen chicken products (like Tyson, Kirkwood, or store brands) in the air fryer produces a texture that is light-years ahead of a standard oven or microwave.
The Master Base Method (From Frozen)
- No Thawing Required: Seriously, do not thaw! Cooking from frozen is the secret to a crispy crust and juicy interior.
- The “Single Layer” Rule: Avoid stacking tenders or nuggets. Air must hit every side to reach that “fried” texture.
- The Cook: Preheat to 400 degrees F (200 degrees C).
- Time: Generally 10 to 14 minutes, shaking the basket halfway through.
- The Finish: They should be golden brown and reach an internal temperature of 165 degrees F (74 degrees C).
7 “Busy Parent” Flavor & Serving Hacks
| Recipe Style | Key Ingredients | Pro Tip |
| 1. Sticky Buffalo Tenders | Buffalo sauce, ranch dip, celery sticks. | Toss in sauce only after the tenders are fully crispy. |
| 2. Honey BBQ Crunch | BBQ sauce, sesame seeds, green onions. | Use a thick BBQ sauce so it doesn’t soak into the breading too fast. |
| 3. Parmesan Herb Nuggets | Grated parmesan, dried parsley, garlic salt. | Toss nuggets with a tiny bit of butter before adding the cheese. |
| 4. Asian Sweet Chili | Sweet chili sauce, crushed peanuts. | Add peanuts at the very end for a restaurant-style crunch. |
| 5. The “Healthy” Wrap | Frozen tenders, flour tortillas, fresh lettuce. | Add a swipe of hummus to the wrap for extra protein and moisture. |
| 6. Lemon Garlic Tenders | Lemon pepper seasoning, melted butter. | A quick spray of butter and dust of seasoning makes them taste “fresh.” |
| 7. Teriyaki Glaze | Jarred teriyaki sauce, frozen broccoli. | Throw frozen broccoli in the basket for the last 6 minutes for a full meal. |
Tips for Frozen Chicken
- The “Shake” is Critical: Because frozen products release moisture as they thaw, shaking the basket halfway through is the difference between “soggy” and “crunchy.”
- Adjusting for Quantity: If you are cooking a massive bag of nuggets, you may need to add 2 to 3 minutes to the total time. Always check the internal temperature of a few pieces in the center of the basket.
- Avoid the “Soggy Bottom”: If your air fryer rack is non-stick but prone to sticking, give it a very light spritz of avocado oil spray. Do not use aerosol cooking sprays with propellants, as they can damage the non-stick coating over time.
- Why the High Temp? We use 400 degrees F (200 degrees C) for frozen items because we need to blast the exterior with heat to crisp the breading before the interior meat becomes mushy from the ice crystals melting.
Master Cooking Chart
Note: All times are based on an air fryer preheated to the indicated temperature. Always flip or shake your food halfway through the cooking process.
| Chicken Cut | Temp (F) | Temp (C) | Est. Time (Min) | Internal Temp (F) |
| Boneless Breast | 375 | 190 | 15–18 | 165 |
| Stuffed Breast | 375 | 190 | 20–25 | 165 |
| Thin Sliced Breast | 400 | 200 | 8–10 | 165 |
| Bone-in Thighs | 380 | 193 | 22–25 | 175 |
| Boneless Thighs | 380 | 193 | 12–15 | 175 |
| Drumsticks | 380 | 193 | 22–25 | 175 |
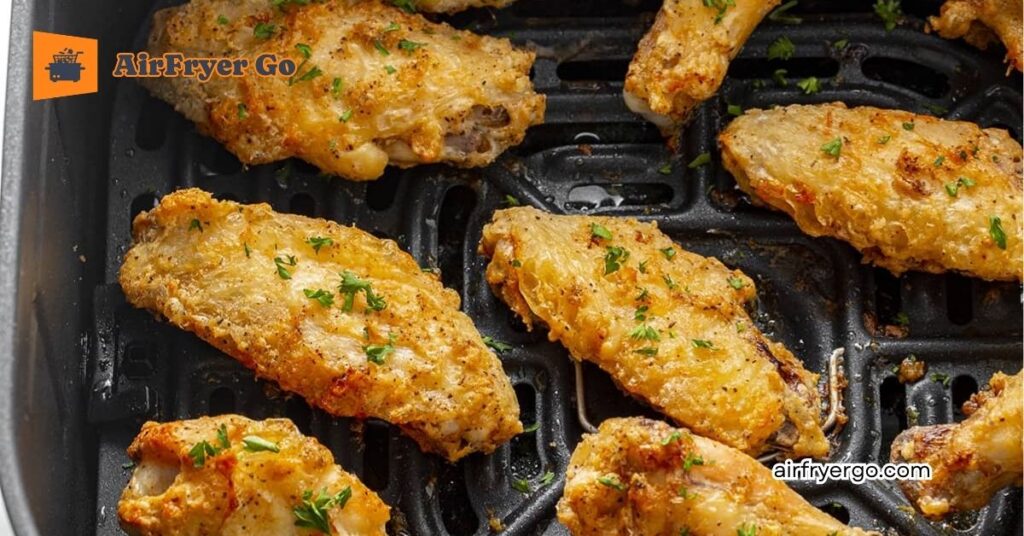
| Wings | 400 | 200 | 20–22 | 175 |
| Whole Chicken | 360 | 182 | 45–55 | 165 |
| Frozen Tenders | 400 | 200 | 10–14 | 165 |
>>> Read More: Air Fryer Crispy Wings Guide: Secrets for Maximum Crunch
Pro-Tips for Using This Chart
1. The “Safety First” Rule
Always verify doneness with a digital meat thermometer. Because air fryers vary in wattage and basket size, the times listed above are starting points. Use them to gauge, but rely on the Internal Temperature column to guarantee safety and quality.
2. Why the Different Temperatures?
- 400 degrees F (200 degrees C): Reserved for items you want crispy, like wings, frozen tenders, or thin-sliced meat. The high heat blasts the surface to lock in crunch.
- 375 degrees F (190 degrees C): The “all-rounder” for breasts. It balances cooking the center without drying out the exterior.
- 360 degrees F (182 degrees C): Perfect for larger items like a whole bird. Lowering the heat ensures the outer skin doesn’t char before the meat near the bone is fully cooked.
3. The “Carry-Over” Cooking Effect
Remember that chicken continues to cook for a few minutes after you remove it from the basket. If you pull your chicken at exactly 165 degrees F, it may overcook slightly while resting. For the absolute best results with breasts, pull them at 160 degrees F and let them rest on the counter—they will naturally climb to the safe temperature as they sit.
4. Don’t Skip the Resting Phase
Even with the “busy parent” frozen hacks, let the chicken sit for at least 3 to 5 minutes after cooking. This allows the juices to redistribute throughout the meat, preventing that “dry, stringy” texture that ruins an otherwise perfect meal.
Common Troubleshooting
Even the most seasoned air-fryer chefs run into challenges. If your chicken didn’t turn out quite the way you expected, don’t worry. Here is your Troubleshooting Guide to help you master the craft and keep your kitchen smoke-free.
1. The “Smoke Alarm” Incident
Smoke is the most common complaint with air frying chicken, especially with fatty cuts like bone-in thighs or skin-on wings.
- The Cause: Excess fat drippings hit the heating element and start to burn.
- The Fix: * Add 2 tablespoons of water to the bottom of the basket (below the tray). This cools the dripping fat before it can smoke.
- Ensure your basket is clean; leftover residue from previous meals will burn at high temperatures.
- If the chicken is heavily marinated in sugary sauces (like BBQ), the sugars will burn quickly. Always add those glazes in the last 3 minutes only.
2. “Why is my chicken skin soggy?”
If you were promised “crispy” but ended up with “soggy,” your moisture-management strategy needs adjustment.
- The Cause: Steam is trapped in the basket.
- The Fix:
- Pat it dry: Never skip the step of patting your meat dry with paper towels before seasoning.
- Stop overcrowding: If the pieces are touching, air cannot circulate, and you are effectively steaming the meat. Give each piece at least half an inch of space.
- Use the “Secret Weapon”: A light dusting of baking powder or cornstarch is a game changer for skin crispiness.
3. “My seasoning is burnt, but the chicken is raw”
This usually happens when you use high-heat settings with spices that have low burn points.
- The Cause: Too much sugar or dried herbs burning under direct heat.
- The Fix:
- Layer your spices: Use salt, pepper, garlic powder, and paprika as a base rub. Save delicate, leafy herbs (parsley, cilantro) or sugar-heavy glazes for the very end of the cooking process.
- Check your temperature: If your seasoning is charring, drop the temperature by 25 degrees F (14 degrees C) and increase the cooking time slightly.
4. “The inside is dry, but the outside looks perfect”
This is the classic “Breast Mistake” that discourages people from eating healthy chicken.
- The Cause: Overcooking and failing to account for “carry-over heat.”
- The Fix:
- Pull it early: Remember the 160 degrees F (71 degrees C) rule for breasts.
- Use a thermometer: Don’t guess by time alone. Every air fryer has a different airflow efficiency; a digital thermometer is the only way to be 100% sure.
- The Rest Period: Always let your chicken rest for 5–10 minutes. This is non-negotiable—it’s when the juices redistribute throughout the fibers.
5. “My breading is falling off”
Nothing is more frustrating than a naked piece of chicken.
- The Cause: The coating wasn’t given a chance to “set” or the chicken was too damp.
- The Fix:
- The “Dredge” method: If you are breading manually (flour -> egg -> breadcrumbs), let the breaded chicken sit on a wire rack for 10 minutes before air frying. This helps the coating adhere to the surface.
- Don’t touch it: Avoid the temptation to flip your breaded chicken more than once. The less you move it, the better the crust will stay intact.
Frequently Asked Questions (FAQs)
1. Can I put raw chicken directly in the air fryer?
Yes! The air fryer is essentially a high-powered convection oven. It is perfectly safe and highly effective at cooking raw chicken. In fact, it produces a better, crispier result than a traditional oven because of the high-speed air circulation.
2. Do I need to use oil for air fryer chicken?
A light mist of oil is recommended. While the air fryer doesn’t require deep-frying amounts of oil, a light spritz (using an oil mister or spray bottle) helps the seasonings stick, assists in the Maillard reaction (browning), and ensures the skin or breading becomes crunchy rather than dry/dusty. Avoid aerosol sprays that contain soy lecithin, as these can build up and damage your air fryer’s non-stick coating over time.
3. Why is my air fryer smoking while cooking chicken?
Smoke is usually caused by fat drippings hitting the heating element. To stop this, place 2 tablespoons of water in the bottom of the basket (below the cooking rack). This prevents the fat from smoking. Also, ensure your basket is cleaned of old grease before every cook.
4. Can I cook frozen chicken tenders and fresh chicken at the same time?
No. Frozen chicken requires a longer cooking time and may release more moisture as it thaws, which will turn fresh chicken into a soggy mess. Always cook items with similar cooking times and moisture levels together in the same batch.
5. How do I know when the chicken is fully cooked without a thermometer?
While a digital meat thermometer is the only 100% accurate way to check (165 degrees F for breasts, 175 degrees F for thighs/legs), you can look for these signs:
- The juices run completely clear (no pink tint).
- The meat is opaque throughout when cut into the thickest part.
- For drumsticks, the meat has pulled back significantly from the bone.
6. Can I use aluminum foil or parchment paper in the air fryer?
Yes, but with caution. You can use parchment paper to make cleanup easier, but only if it is weighed down by food. If the paper is loose, it can fly up and hit the heating element, creating a fire hazard. Aluminum foil can be used but be aware that it can hinder air circulation if it covers the entire bottom of the tray.
7. Is air-fried chicken actually healthier?
Yes. Air-fried chicken uses significantly less oil than deep-frying—often 70% to 80% less fat. By replacing deep-frying with air frying, you drastically reduce calorie and fat intake while still achieving the crispy texture that makes fried chicken so delicious.
Conclusion
Mastering air fryer chicken recipes is more than just learning to cook; it’s about discovering a faster, healthier, and undeniably more delicious way to feed the people you love. Whether you are aiming for that perfect, crackling skin on a whole bird or trying to turn a bag of frozen tenders into a weeknight victory, you now have the tools and techniques to achieve perfection every time.
At AirFryer Go, we believe that the best meals are the ones where you feel confident in the kitchen. We hope this guide becomes your go-to reference—the one you keep bookmarked for those busy Tuesday nights or when you’re ready to impress with a weekend roast.
Ready to keep learning? * Share your success: Which recipe are you trying first? Tell us about your results in the comments below!
- Join the community: Don’t forget to check out our other guides on [Best Air Fryer Accessories] or [The Ultimate Air Fryer Vegetable Cheat Sheet] to complete your meal.
- Stay updated: Subscribe to the AirFryer Go newsletter for weekly tips, tricks, and new recipes delivered straight to your inbox.
Happy frying, and here’s to many more crispy, juicy, and stress-free dinners!
Recommended next reads:
Juicy Air Fryer Pork Chops: The Ultimate Guide