Searching for the best air fryer pork recipes often leads to the same frustrating result: a piece of meat that’s either charred on the outside or disappointingly dry on the inside. At AirFryer Go, we’ve spent hundreds of hours in the kitchen testing temperatures and timing for every cut, from thick-cut bone-in chops to succulent pork belly, to ensure you never have to settle for tough pork again.
Whether you are working with fresh cuts or forgotten frozen chops, this guide provides the professional techniques and “pro-hacks” you need to achieve that elusive, restaurant-quality juiciness with a perfect golden crust. Let’s stop guessing, get that air fryer preheated, and start cooking pork that finally tastes as good as it looks.
>>> Read More: The Ultimate Air Fryer Recipe Index: 101+ Easy & Healthy Ideas for Every Meal
The Science of Air Frying Pork
To master air fryer pork recipes, you must view your air fryer as a precision-controlled convection chamber rather than just a “fryer.” Pork is a lean, unforgiving protein; unlike beef, which can be eaten rare, or chicken, which is forgivingly moist, pork requires absolute precision to avoid turning into a dry, fibrous brick.
At AirFryer Go, we rely on three core pillars of science to ensure every cut stays succulent:
1. The Denaturation Threshold
Proteins in pork begin to denature (coagulate) at around 140°F (60°C). As the temperature climbs toward 160°F (71°C), the muscle fibers tighten rapidly, squeezing out all internal moisture.
- The Go-To Temp: The USDA now suggests 145°F (63°C) as the safe internal temperature for pork. Pulling your meat at 140°F—allowing for “carry-over” heat to bring it to the safe zone—is the secret to the juiciest pork chops you’ve ever tasted.
2. Moisture Management (The Maillard vs. Steam Balance)
The biggest mistake home cooks make is surface moisture. If the surface of your pork chop is damp, the air fryer spends the first 5 minutes of cooking time “steaming” the meat rather than searing it.
- The Technique: Always pat your pork bone-dry with paper towels.
- The Barrier: Apply a thin layer of oil. This creates a thermal bridge, conducting the air fryer’s heat directly into the surface to trigger the Maillard reaction (the browning process) before the interior has a chance to overcook.
3. The “Fat-Shield” Strategy
Fat is flavor, but it is also a liability in an air fryer. With cuts like pork belly or ribs, the fat renders quickly and drips into the basket. If it hits the heating element, it incinerates, causing smoke and acrid flavors.
- The Solution: Use the “Drip-Pan Hack.” Place a small piece of sourdough bread or a shallow tray of water in the bottom of the air fryer (below the rack). The bread acts as an absorbent sponge, and the water acts as a heat sink, preventing the fat from vaporizing on contact with the hot element.
4. Aeration and Heat Distribution
Air fryers are “air-dominant” tools. If you crowd the basket, you create an air blockage, turning your meal into a soggy, steamed mess.
- The Rule of Thumb: Ensure at least 1 inch of space between each pork chop or piece of tenderloin. If you can’t fit them without crowding, cook in two batches. The extra five minutes of waiting is the difference between “restaurant-quality” and “sad dinner.”
Mastering Pork Chops
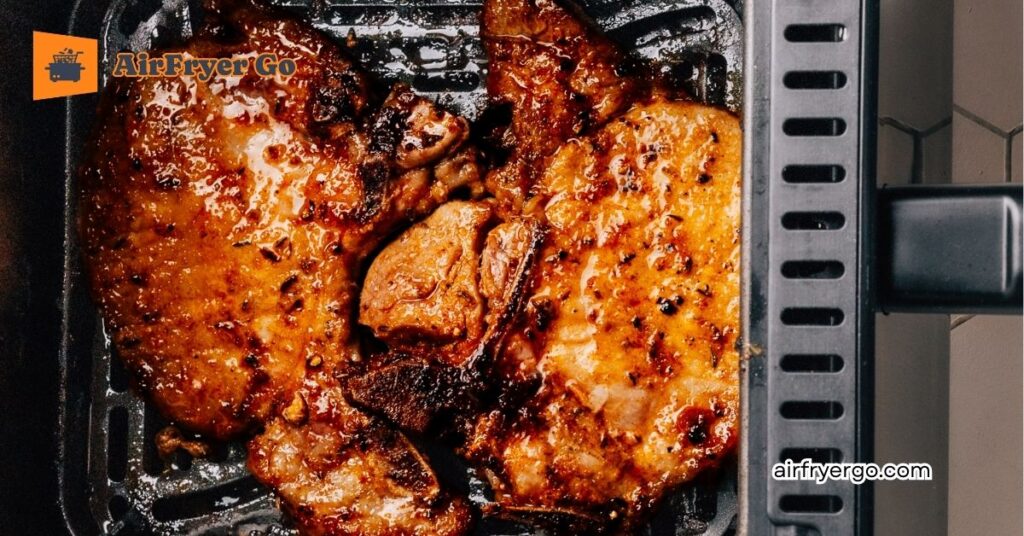
To master air fryer pork recipes, you must treat pork chops as a “high-precision” protein. Because chops (especially boneless) are lean, they can overcook in a matter of seconds.
The Master Base Method
- Prep: Bring to room temperature (20 minutes). Pat bone-dry with paper towels.
- Season: Always apply a generous coat of oil before your rub to conduct heat.
- Preheat: Set air fryer to 375°F (190°C).
- The Pull: Aim for 140°F (60°C) internal temperature; the carry-over heat will bring it to the perfect 145°F (63°C) while resting.
- The Rest: Essential! Rest for 5 minutes before slicing.
10 Ways to Flavor Your Pork Chops
| Recipe Style | Key Ingredients | Pro Tip |
| 1. Classic Garlic-Herb | Garlic powder, dried thyme, rosemary, salt/pepper. | Rub under the bone of the chop for extra flavor. |
| 2. Panko-Crusted | Panko breadcrumbs, Parmesan, egg wash. | Lightly spray the breading with oil so it turns golden. |
| 3. Sweet & Smoky BBQ | Paprika, brown sugar, chili powder, BBQ sauce. | Brush BBQ sauce on only for the last 2 minutes. |
| 4. Cajun Kick | Smoked paprika, cayenne, oregano, onion powder. | Press the spices firmly into the meat for a “blackened” effect. |
| 5. Honey-Garlic Glaze | Honey, minced garlic, soy sauce, splash of vinegar. | Glaze in the final 3 minutes to prevent the sugar from burning. |
| 6. Lemon-Pepper | Cracked black pepper, lemon zest, garlic salt. | Finish with a fresh squeeze of lemon juice after resting. |
| 7. Apple-Cider Rub | Dried sage, cinnamon, brown sugar, apple pie spice. | Pairs perfectly with the natural sweetness of pork. |
| 8. Mustard-Crusted | Dijon mustard (base), breadcrumbs, parsley. | Brush the mustard on as a “glue” for the breadcrumbs. |
| 9. Mediterranean Style | Dried oregano, crumbled feta, olive oil. | Use a thin layer of olive oil instead of butter for a cleaner crust. |
| 10. “Diner-Style” Salt & Pepper | Coarse kosher salt, cracked black pepper (heavy). | Keep it simple; focus on the sear quality. |
Tips for Pork Chops
- Bone-in vs. Boneless: Bone-in chops cook slightly slower and retain more moisture. If you are mixing them in the same batch, use a probe thermometer—pull the boneless ones out as soon as they hit 140°F (60°C).
- The “Frozen” Shortcut: If you forgot to defrost, don’t panic. Cook at 325°F (163°C) for 8–10 minutes to thaw, then bump to 400°F (204°C) for 4–5 minutes to sear. It’s not “gourmet,” but it saves dinner.
- The “Goldilocks” Thickness: The ideal chop for an air fryer is 1 to 1.25 inches thick. Anything thinner will be “well-done” before you can get a crust. If yours are thin, watch them like a hawk—they may finish in just 6–8 minutes!
- Preventing “Soggy Bottoms”: Since pork chops release fat as they cook, make sure you don’t crowd the basket. If you’re using a breaded recipe, elevate them on a rack inside the basket if possible to allow air to reach the bottom.
>>> Read More: Juicy Air Fryer Pork Chops: The Ultimate Guide
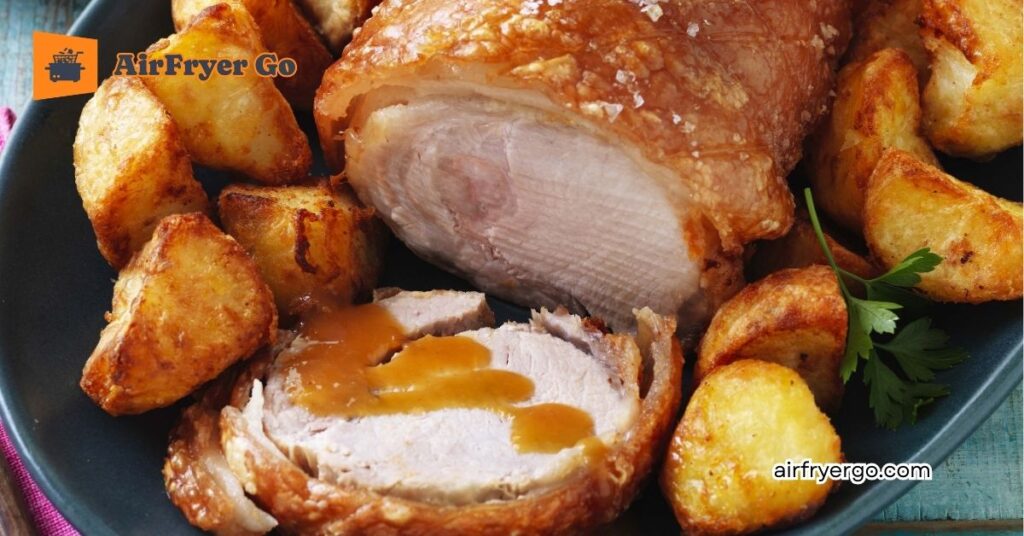
Premium Cuts (Tenderloin & Roast)
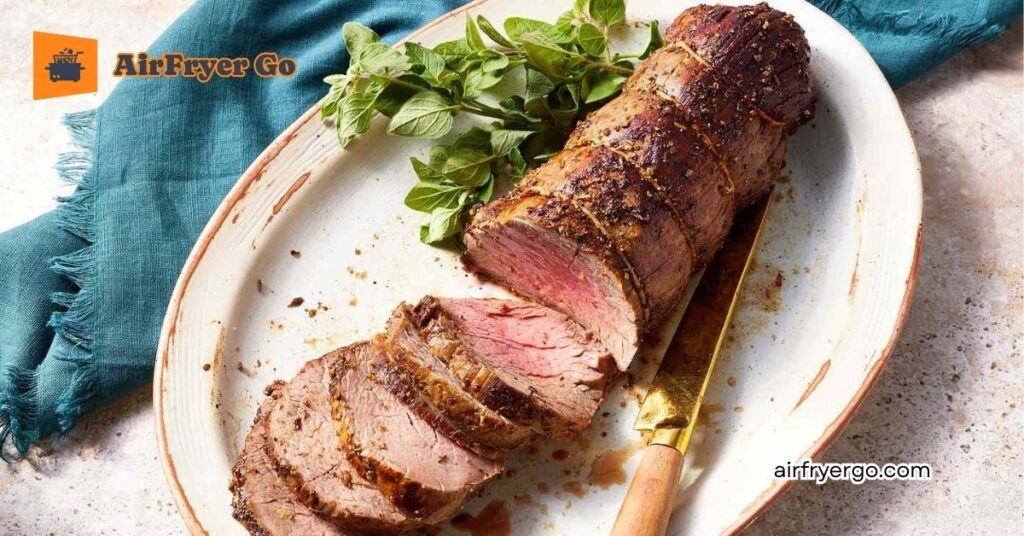
Larger cuts like Pork Tenderloin and Pork Roast require a different strategy than pork chops. Because they are thicker, they need a “Two-Phase” cooking method: Low and Slow to bring the center to temperature, followed by a High-Heat Sear to create a savory crust.
The Master Base Method for Large Cuts
- Prep: Remove silverskin from the tenderloin (it won’t melt). Pat bone-dry.
- Phase 1 (The Roast): Cook at 325°F (163°C) until the internal temperature reaches 135°F (57°C).
- Phase 2 (The Sear): Increase heat to 400°F (204°C) for 3–5 minutes to develop color.
- The Rest: Crucial. Let it rest for 15 minutes. The temperature will rise to the perfect 145°F (63°C).
10 Recipe Styles for Tenderloin & Roast
| Recipe Style | Flavor Profile | Key Technique |
| 1. Herb-Roasted Garlic | Rosemary, thyme, garlic cloves. | Stud the roast with garlic slivers for deep flavor. |
| 2. Maple-Dijon Glaze | Pure maple syrup, Dijon, cider vinegar. | Apply glaze only during the final 5 minutes of roasting. |
| 3. Spicy Dry Rub | Brown sugar, chili, smoked paprika, cumin. | Massage the rub in 1 hour before cooking for better penetration. |
| 4. Mediterranean Lemon | Oregano, lemon zest, olive oil, cracked pepper. | Use a thin coating of high-smoke-point oil for the final sear. |
| 5. Coffee-Bacon Crust | Espresso powder, brown sugar, bacon bits. | The bacon fat protects the lean tenderloin from drying out. |
| 6. Pineapple Teriyaki | Soy sauce, ginger, pineapple juice, honey. | Reduce the glaze on the stove first so it’s thick enough to stick. |
| 7. Balsamic Glazed | Balsamic reduction, thyme, crushed garlic. | Balsamic sugar content is high; keep temp below 350°F (177°C). |
| 8. Mustard & Sage | Whole grain mustard, fresh sage, sea salt. | The mustard acts as a flavor anchor for the sage leaves. |
| 9. “Porchetta-Style” | Fennel seeds, garlic, rosemary, orange zest. | Rub heavily with crushed fennel seeds for an authentic taste. |
| 10. Apricot-Ginger | Apricot preserves, fresh grated ginger, lime. | Use preserves to create a shiny, tacky “lacquer” finish. |
Tips for Large Pork Cuts
- Uniformity is Key: If your tenderloin is tapered, fold the thin “tail” under and secure it with kitchen twine. This ensures the entire piece cooks at the same rate, preventing the thin end from turning into “pork jerky.”
- Don’t Forget the Silverskin: If you leave the white, tough membrane (silverskin) on the tenderloin, it will act like a rubber band and prevent seasoning from soaking in. Use a sharp knife to slide under the membrane and peel it off before seasoning.
- The “Thermometer” Rule: Never rely on “minutes per pound” for air fryer roasts. Different air fryers have different fan speeds and heating intensities. Use a probe thermometer that stays in the meat while it cooks. It is the only way to guarantee the difference between “juicy” and “dry.”
- Avoid the “Dry-Out”: If you are cooking a lean tenderloin, you can wrap it in thin slices of prosciutto. The fat from the prosciutto will baste the meat as it cooks, keeping the center incredibly tender.
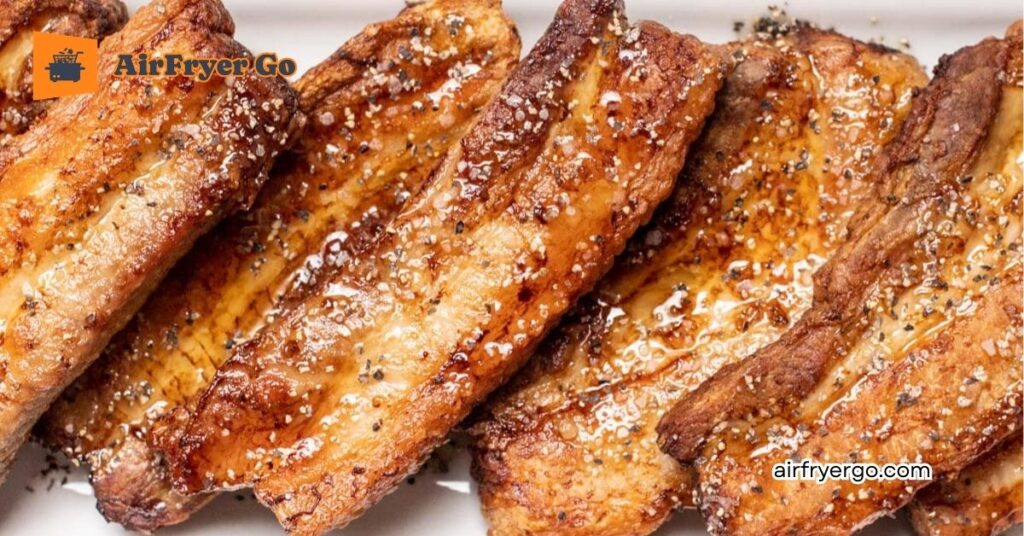
Fatty Cuts (Pork Belly & Ribs)
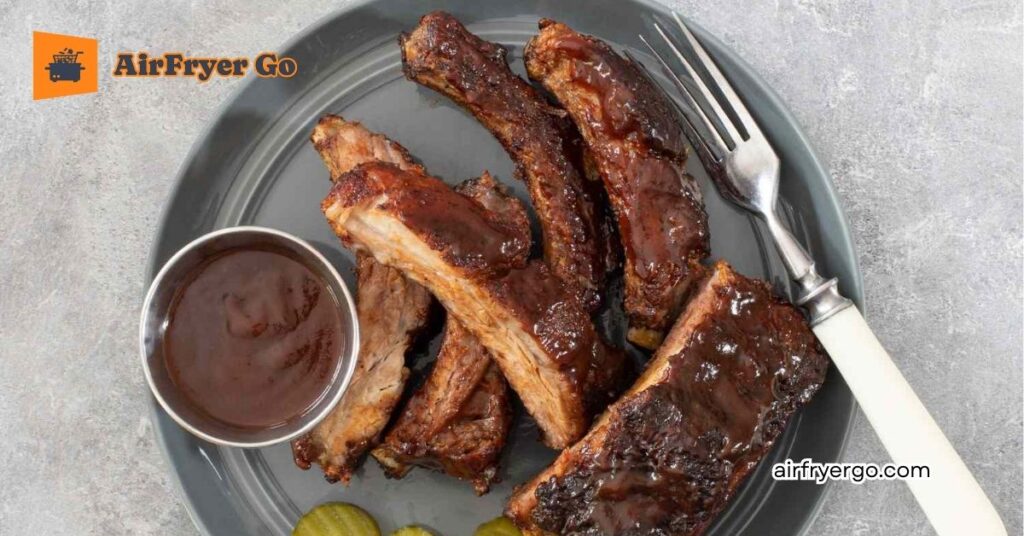
Cooking fatty cuts like Pork Belly and Ribs in an air fryer is a “high-risk, high-reward” endeavor. The high fat content produces intense flavor, but also excessive smoke if not managed correctly.
The Master Base Method for Fatty Cuts
- The Smoke Control: Always place a piece of bread or 2 tablespoons of water in the basket bottom.
- Phase 1 (The Render): Cook low at 300°F (150°C) for 20–30 minutes to slowly melt the fat.
- Phase 2 (The Crisp): Increase to 400°F (204°C) for 5–8 minutes to “crack” the skin/crust.
- The Glaze: Never apply sugary BBQ sauces until the final 5 minutes, or they will burn and turn bitter.
10 Recipe Styles for Pork Belly & Ribs
| Recipe Style | Cut | Key Technique |
| 1. Crispy Belly Bites | Pork Belly | Cut into 1-inch cubes; sear on all sides. |
| 2. Sticky Hoisin Ribs | Ribs | Use a rib rack to stand them vertically. |
| 3. Salt & Pepper Belly | Pork Belly | Score the skin deeply for “crackling” perfection. |
| 4. Dry-Rubbed Memphis | Ribs | Heavy paprika, garlic, onion, and brown sugar. |
| 5. Gochujang Glazed | Pork Belly | Toss in Korean chili paste and sesame oil. |
| 6. Sweet Chili Ribs | Ribs | Use sweet chili sauce as a glaze in final 4 minutes. |
| 7. Garlic-Butter Ribs | Ribs | Finish with herb butter while resting. |
| 8. Char Siu (Chinese BBQ) | Pork Belly | Marinate in hoisin, honey, and soy for 4 hours. |
| 9. Brown Sugar & Bourbon | Ribs | Glaze with bourbon-infused BBQ sauce. |
| 10. “Crackling” Roast | Pork Belly | Keep skin side up; pat very dry for crunch. |
Tips for Fatty Cuts
- Managing the “Flare-Up”: If you see smoke, stop. It means the fat has hit the heating element. Add a small piece of bread to the bottom of the pan to soak up the grease immediately.
- The “Rib Rack” Secret: Ribs are long and air fryers are small. Invest in an adjustable rib rack. This allows you to cook a full rack of ribs by standing them vertically, which ensures even airflow and prevents the bottom of the ribs from “steaming” in the grease.
- The “Crackling” Test: If you want crispy skin on pork belly, you must score the fat in a diamond pattern. Before the high-heat blast, rub the skin with a mix of salt and a tiny bit of baking powder. The baking powder changes the pH of the skin, making it shatteringly crispy.
- The Resting Period (Wait for it!): Pork belly is essentially pure flavor, but it’s intense. Resting it for at least 15 minutes allows the fat to solidify slightly, making it feel less “greasy” and more “melt-in-your-mouth.”
Master Cooking Chart
This Master Cooking Chart is the essential reference for your AirFryer Go readers. It is designed to be a “quick-look” resource that prevents overcooking and ensures the best possible texture for every cut of pork.
AirFryer Go: Ultimate Pork Cooking Cheat Sheet
Note: All times are based on an air fryer preheated to the indicated temperature. Always flip your meat halfway through the cooking process.
| Pork Cut | Temp (F) | Temp (C) | Est. Time (Min) | Target Internal (F) |
| Pork Chops (1″ Bone-in) | 375 | 190 | 12–15 | 145 |
| Pork Chops (1″ Boneless) | 375 | 190 | 10–12 | 145 |
| Pork Tenderloin | 325/400 | 163/204 | 18–22 total | 145 |
| Pork Belly (Cubed) | 400 | 204 | 15–20 | N/A |
| Pork Ribs (Rack) | 300/400 | 150/204 | 25–35 total | Fall-off-bone |
| Pork Cutlets (Breaded) | 375 | 190 | 8–10 | 145 |
| Pork Roast (Loin) | 325 | 163 | 30–45 | 145 |
| Pork Chops (Frozen) | 325/400 | 163/204 | 15–20 total | 145 |
Pro-Tips for Using This Chart
1. The “Internal Temperature” Authority
Pork is often ruined by “time-based” cooking. Always use an instant-read thermometer. Pull the pork when it hits 140°F (60°C). The temperature will climb to the safety standard of 145°F (63°C) while the meat rests.
2. Mastering the Heat Zones
- 300°F – 325°F (150°C – 163°C): The “Render & Roast” Zone. Used for large roasts or frozen cuts. It allows the heat to reach the center without scorching the outside.
- 375°F (190°C): The “Workhorse” Zone. Ideal for chops and breaded cutlets where you want a balance of internal cooking and surface browning.
- 400°F (204°C): The “Crisp” Zone. Reserved for the final few minutes of cooking to achieve the perfect Maillard reaction (golden brown crust) on pork belly and finished roasts.
3. The “Carry-Over” Reality
Unlike beef, pork fibers are dense. The internal temperature of a large roast can rise by 5°F to 10°F during the resting phase. If you wait until it hits 145°F in the machine, it will be 155°F on the plate—which is the “danger zone” for dry, tough pork.
4. The “Resting” Mandatory Rule
- Chops: 5 minutes.
- Tenderloin/Roasts: 15 minutes.
- Belly/Ribs: 10 minutes. Resting is not optional; it is the final step in the cooking process where juices redistribute throughout the muscle fibers.
Troubleshooting: “The 10-Minute Save”
Even the most seasoned air-fryer chefs have “oops” moments. When you realize your pork chop looks a bit too gray, or your smoke alarm starts chirping, don’t panic. Use the AirFryer Go “10-Minute Save” protocol to rescue your dinner.
1. The “My Pork is Dry!” Emergency
If you accidentally overcooked a lean cut like a tenderloin or boneless chop, the fibers have tightened and the moisture is gone.
- The Rescue: * The Butter Bath: Immediately move the meat to a cutting board, brush it generously with warm, melted butter or olive oil, and cover it tightly with foil. Let it rest for 10 minutes. The fat will slowly soak back into the dry fibers.
- The Sauce Solution: Slice the pork thinly against the grain and drench it in a warm, acidic sauce (like a lemon-caper butter or a quick pan-gravy). The acidity and fat mask the texture of dry meat.
- The Lesson: Next time, use a probe thermometer and pull the meat at 140°F (60°C).
2. The “Smoke Alarm” Incident
You’re cooking pork belly or ribs, and thick, white smoke starts pouring out of your air fryer.
- The Rescue: * The “Drip-Pan Hack”: Open the basket immediately. If you have fat pools on the bottom, use a paper towel to soak them up carefully, then place a clean slice of sourdough bread at the bottom of the basket. The bread will absorb any future fat drippings like a sponge.
- The Heat Check: Lower the temperature by 25°F (14°C) immediately. The smoke is caused by fat hitting the heating element, not by the air inside the basket.
- The Lesson: Always use the “Water Buffer” (2 tablespoons of water at the bottom) or the “Bread Hack” before you start fatty cuts.
3. The “My Breading Fell Off” Disaster
You pull out your breaded pork chops, but the Panko is a soggy pile at the bottom of the basket.
- The Rescue: * The “Crisp-Up” Finish: If the meat is cooked but the coating is pale and loose, crank the air fryer to 400°F (204°C) and spritz the top of the chops with a light coat of cooking spray. Give it 2–3 minutes. It won’t be perfect, but it will save the texture.
- The Lesson: You likely skipped the “Resting the Breaded Meat” step. After breading, let the chops sit on a wire rack for 10 minutes before cooking; this allows the egg-wash “glue” to become tacky, helping it stick to the meat during the air-flow process.
4. The “Pale & Gray” Meat (No Crust)
The pork is cooked to 145°F (63°C), but it looks boiled and unappetizing.
- The Rescue: * The Torch or Broil: If you have a kitchen torch, use it to sear the surface. If not, don’t put it back in the air fryer (it will just overcook). Instead, heat a cast-iron skillet to high heat with a tiny bit of oil and “flash sear” the outside for 30 seconds per side.
- The Lesson: Your meat was too wet. Pat it bone-dry with paper towels before seasoning. The Maillard reaction (browning) cannot happen if the surface is damp.
Quick Reference: The 10-Minute Save Table
| Problem | Immediate Fix | Preventive Measure |
| Dry/Overcooked | Butter/Foil resting + Sauce | Use a digital probe thermometer. |
| Smoke Alarm | Add bread/water to the base | Use the “Drip-Pan Hack.” |
| Breading Fell Off | High-heat spritz (2 mins) | Let breaded meat rest 10 mins before frying. |
| Pale/No Crust | Flash sear in hot pan | Pat meat completely dry first. |
Frequently Asked Questions (FAQs)
1. Why does my pork chop turn out dry in the air fryer?
Pork is a lean protein, and air fryers cook with high-velocity, dry heat. If you cook it past 145°F (63°C), the muscle fibers tighten and expel all moisture. The best fix is to use a digital probe thermometer, pull the pork at 140°F (60°C), and allow it to rest for at least 5 minutes.
2. How can I stop the smoke alarm from going off when cooking pork belly?
Smoke is caused by fat dripping onto the heating element. To prevent this, place 2 tablespoons of water in the bottom of your air fryer basket before starting. Alternatively, place a slice of bread at the bottom of the basket—it acts as a “fat sponge” and stops drippings from incinerating on the hot metal.
3. Do I need to flip pork chops in the air fryer?
Yes. Even with high-efficiency air circulation, flipping your pork chops halfway through the cooking process ensures even browning on both sides and prevents one side from becoming “soggy” due to contact with the cooking rack.
4. Can I cook frozen pork chops directly in the air fryer?
You can, but it is not ideal for the best texture. If you are short on time, cook them at a lower temperature (325°F / 163°C) for 8–10 minutes to thaw the center, then increase the temperature to 400°F (204°C) for 4–5 minutes to sear the outside.
5. Why is my breaded pork chop crust falling off?
The crust often detaches if the meat is too wet or if the breading hasn’t had time to “set.” Always pat your meat bone-dry with paper towels before applying your egg wash. Additionally, let your breaded chops sit on a wire rack for 10 minutes before air frying—this allows the egg “glue” to become tacky and adhere firmly to the meat.
6. Is it safe to use aluminum foil in the air fryer for ribs?
Yes, using foil for “low and slow” recipes like ribs is a great way to lock in moisture and tenderness. However, ensure the foil is tightly wrapped around the food and does not block the air vents. Never line the bottom of the basket in a way that prevents the air from circulating effectively.
7. How long should I rest my pork roast after air frying?
Resting is the final secret to success. For smaller cuts like chops, rest for 5 minutes. For larger roasts or tenderloins, you must rest for 15 minutes. This waiting period allows the juices to redistribute throughout the meat, resulting in a tender, succulent slice every time.
Conclusion
Mastering air fryer pork recipes is no longer a game of chance. By moving away from “time-based” cooking and embracing the science of internal temperature, moisture management, and proper aeration, you now have the professional tools to transform any cut of pork into a succulent, restaurant-quality meal.
Whether you are rescuing a pack of frozen chops on a busy Tuesday or slow-roasting a tenderloin for a weekend feast, remember: the secret lies in the details. From patting your meat bone-dry to respecting the resting time, these small steps at AirFryer Go yield massive results in texture and flavor every single time.
Ready to start your journey?
- Take Action: Pick your favorite cut from our Master Cooking Chart and put these techniques to the test for dinner tonight.
- Join the Community: Which recipe are you tackling first? Share your results—or your favorite seasoning rub—in the comments below. We love seeing how you’re making these recipes your own!
- Stay Inspired: Hungry for more? Explore the rest of our library at AirFryer Go for more expert-tested guides and tips to elevate your air frying game to the next level.
Happy Air Frying!
Recommended next reads:
The Best Damn Air Fryer Salmon: Crispy & Juicy Every Time
25+ Air Fryer Chicken Recipes: Crispy, Juicy and Foolproof
10+ Air Fryer Beef Recipes: Perfect Steaks, Burgers, and More