There is nothing more disappointing than expecting a gold-standard crunch only to end up with a soggy meal, which is why learning how to preheat an air fryer is the single most important step for any home chef. While these modern appliances are marketed as “instant,” starting with a cold basket often leads to uneven cooking and disappointing textures that fail to hit the mark.
At AirFryer Go, we believe that three minutes of patience can transform your cooking from average to extraordinary. Whether you are using a Ninja, Gourmia, or Power XL, mastering the heat-up phase ensures your food sears the moment it hits the basket. Let’s dive into the simple techniques that will help you achieve that perfect restaurant-level crispiness every single time.
>>> Read More: How to Use an Air Fryer: The Ultimate Master Guide (From Unboxing to Pro)
Why Preheating Your Air Fryer Matters
Preheating your air fryer might seem like an unnecessary step, but understanding why it’s important can completely transform your cooking experience. Let’s break it down!
Ensures Even Cooking
One of the biggest advantages of preheating is that it helps your food cook evenly. Just like with a conventional oven, allowing your air fryer to reach the desired temperature before adding your food means that the hot air starts cooking your meal immediately, instead of warming up the appliance first. Without this step, you might end up with food that’s crispy on the outside but undercooked or cold in the center.
Speeds Up Cooking Time
When your air fryer is already hot, cooking times are more accurate and often shorter. Food starts cooking right away, rather than spending the first few minutes waiting for the fryer to warm up. This is especially helpful when you’re in a rush or making quick, frozen meals.
Improves Crispness and Texture
For foods that rely on high heat for that perfect crunch—like fries, chicken wings, or roasted vegetables—preheating creates the ideal cooking environment. It helps seal in moisture and develop a golden-brown crust, preventing the soggy or uneven textures that can happen when starting from a cold air fryer.
Consistency with Recipes
Many air fryer recipes are designed with preheating in mind. If you skip it, you might find that your food needs extra cooking time or doesn’t achieve the same texture as expected. By making preheating a habit, you’ll get more consistent, reliable results with your favorite dishes.
Reduces Food Sticking
A hot basket can also help prevent food from sticking. When the surface is already heated, food tends to release more easily, meaning less frustration and easier cleanup.
While preheating isn’t required for every meal, understanding when and why to do it can elevate your air-frying game, giving you crispier, tastier, and more reliable results every time. Ready to give it a try? Let’s move on to what you’ll need to know before you start!
What You Need to Know About Air Fryer Preheating

Before you start preheating your air fryer, it helps to understand a few key details. Knowing how your appliance works and when preheating makes the most difference can set you up for success in the kitchen. Let’s cover the essentials!
Check Your Air Fryer Model
Not all air fryers are designed the same. Some models come with a dedicated preheat button, making the process effortless—just press a button, and the air fryer heats up to a set temperature before notifying you when it’s ready. If your air fryer doesn’t have this function, you’ll need to manually set the temperature and timer, but don’t worry—it’s just as simple, and we’ll go through that shortly.
When Preheating Is (and Isn’t) Necessary
Preheating makes a big difference for certain foods, but it’s not always required. It’s especially helpful for:
- Frozen foods: Fries, nuggets, and frozen vegetables cook more evenly and get crispier with a preheated air fryer.
- Baked goods: Cookies, muffins, and pastries need consistent heat to rise and cook properly.
- Proteins: Chicken wings, steak, and fish benefit from a hot basket to create a flavorful sear and lock in moisture.
On the other hand, foods that cook low and slow—like reheating leftovers or roasting nuts—typically don’t require preheating and may turn out just fine starting from a cold air fryer.
Know Your Cooking Surface
Make sure your air fryer is placed on a flat, heat-resistant countertop with at least a few inches of space around it. Proper airflow is essential for the appliance to heat evenly and safely. Avoid placing it too close to a wall or under a cabinet, as the hot air vent can cause overheating or damage to nearby surfaces.
How Long to Preheat
Most air fryers only need about three to five minutes to preheat, depending on their size and power. As a general rule:
- For temperatures under 300°F (150°C), three minutes is usually enough.
- For temperatures between 300°F and 400°F (150°C – 200°C), aim for five minutes.
Larger air fryers might need an extra minute or two, while smaller models may heat up faster. After a few tries, you’ll get a feel for what works best with your particular air fryer.
The Preheating Indicator
If your air fryer doesn’t have an automatic indicator to signal when it’s fully preheated, a simple trick is to set it for a few minutes at your desired temperature. When the timer ends, you’ll know your air fryer is hot and ready to use.
With these basics in mind, you’ll be ready to preheat your air fryer like a pro—and achieve delicious, consistent results with every meal. Now, let’s move on to the step-by-step process to get it right every time!
>>> Read More: Top Air Fryer Tips and Tricks: Master Your Air Fryer Like a Pro
How to Preheat an Air Fryer (Step-by-Step Guide)
Preheating your air fryer is quick and easy once you know the steps! Here’s a simple guide to make sure your appliance is hot and ready for perfectly cooked, crispy food.
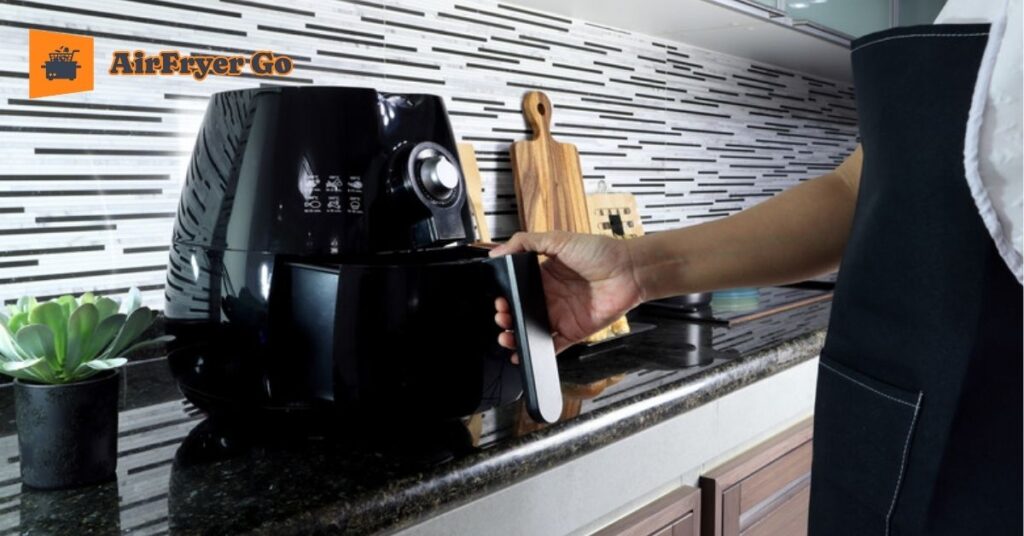
Step 1: Place Your Air Fryer on a Stable Surface
Before turning on your air fryer, make sure it’s sitting on a flat, heat-resistant countertop. Leave a few inches of space around it, especially near the exhaust vent, to allow for proper airflow. This prevents overheating and ensures the appliance warms up evenly.
If you’re using your air fryer on a surface that could be sensitive to heat, consider placing a silicone mat or heat pad underneath for extra protection.
Step 2: Plug It In and Turn It On
Once your air fryer is positioned correctly, plug it into a grounded outlet. Avoid using extension cords, as air fryers draw a lot of power and work best when connected directly to a wall socket.
Most air fryers turn on with a simple power button, while others may automatically enter standby mode when plugged in.
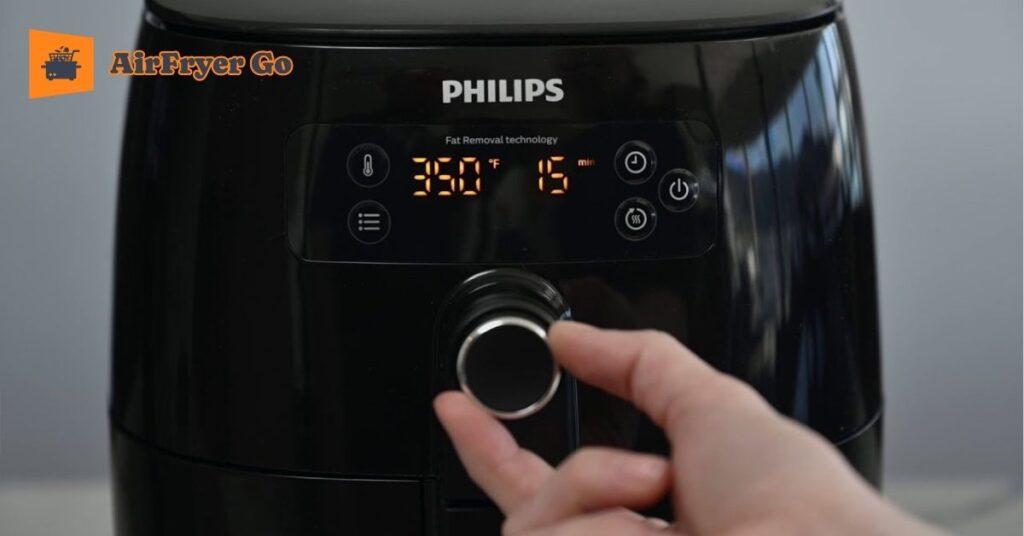
Step 3: Set the Temperature
If your air fryer has a dedicated preheat button, this step is incredibly easy—just press the button and let it do the work. The appliance will heat up to a default temperature, usually around 350°F (175°C), and notify you when it’s ready.
If there’s no preheat button, manually set the temperature to match your cooking recipe. A good general guideline is:
- 350°F (175°C) for most frozen foods, baked goods, and roasted vegetables.
- 400°F (200°C) for high-heat cooking, like chicken wings, steak, or fries.
- 300°F (150°C) for lower-heat dishes or reheating leftovers.
Step 4: Set the Timer
Since air fryers heat up faster than conventional ovens, you won’t need to wait long. Set your timer for about:
- 3 minutes for temperatures under 300°F (150°C).
- 5 minutes for temperatures between 300°F and 400°F (150°C – 200°C).
If you’re unsure, five minutes is a safe bet that works for most air fryer sizes and recipes.
Step 5: Wait for the Preheat Cycle to Finish
Once your air fryer starts heating, give it time to reach the desired temperature. Many models will beep or display an indicator light when preheating is complete.
If your model doesn’t provide a clear preheat signal, you can check by briefly opening the basket—carefully!—and feeling if the inside is warm.
Step 6: Add Your Food
When the preheat cycle ends, open the basket carefully (the air inside will be hot) and add your food. For the best results, arrange items in a single layer without overcrowding, allowing the hot air to circulate evenly.
Close the basket, set your cooking timer, and let the air fryer work its magic.
Step 7: Adjust for Cooking Time
Since your air fryer is already hot, food may cook faster than expected. Check for doneness a couple of minutes earlier than your recipe suggests, especially if you’re cooking something delicate like fish or baked goods.
With these simple steps, preheating your air fryer becomes second nature—and your meals will turn out crispier and more delicious every time. Up next, let’s talk about some common mistakes to avoid while preheating!
Brand-Specific Guides: No “Preheat” Button? No Problem!

One of the most common frustrations for owners is looking at their control panel and realizing there is no dedicated “Preheat” button. At AirFryer Go, we’ve tested dozens of models and found that while the interfaces differ, the logic remains the same.
If your machine doesn’t have a preset, you simply need to take manual control. Here is how to handle the big three brands:
1. How to Preheat Ninja Air Fryer
Most Ninja models (especially the popular Foodi series) are designed to be “ready to go,” but for breaded foods, manual preheating is still superior.
- The Method: Select your desired cooking function (e.g., “Air Fry”). Set the temperature as required by your recipe. Set the timer for 3 minutes.
- Pro Tip: Ninja baskets are deep; if you are cooking on two levels (using a rack), extend the preheat to 5 minutes to ensure the top and bottom air currents are equally hot.
2. How to Preheat Gourmia Air Fryer
Gourmia machines are known for their digital displays, and many do have a preheat prompt, but it can be confusing to bypass or activate.
- The Method: Press the “Preheat” button before selecting your preset. The display will flash “PrE.” Once it reaches temperature, the machine will beep and display “Add Food.”
- No Button? If your specific Gourmia model lacks the icon, simply set it to 200°C for 3 minutes manually. The Gourmia heating element is quite powerful, so it reaches temp faster than most.
3. How to Preheat Power XL Air Fryer
Power XL models often rely on the “M” (Mode) button or a series of icons.
- The Method: Tap the Power icon, then use the temperature arrows to set your heat. Set the time to 3 minutes and hit the Power button again to start.
- The “Secret” Signal: Listen for the fan. Power XL fans are distinct; once the sound settles into a consistent hum, the chamber is usually saturated with heat.
Brand Quick-Reference Guide
| Brand | Recommended Time | Recommended Temp | Feature Note |
| Ninja | 3–5 Minutes | Cooking Temp | Excellent heat retention. |
| Gourmia | 2–3 Minutes | 200°C | Often includes a “PrE” display. |
| Power XL | 3 Minutes | Cooking Temp | Large baskets need full 3 mins. |
Regardless of the brand, never preheat with parchment paper or liners inside the basket. Without food to weigh it down, the air vortex will suck the paper into the heating element, creating a fire hazard. Always add your liners after the preheat cycle is complete and you are ready to add your food.
Technical Reminder: As we note in our capacity surveys, larger 8-quart or dual-basket models may require an extra minute of preheating compared to compact 2-quart versions. Matching your preheat time to your machine’s volume ensures the “sparkling” performance you expect from your investment.
When You Should SKIP Preheating

While preheating is usually the “golden rule” at AirFryer Go, there are specific moments when a blast of instant heat can actually do more harm than good. Understanding when to hit the “start” button on a cold machine is the hallmark of a true air frying expert.
Here are the scenarios where you should skip the preheat:
1. Delicate Pastries and Frozen Dough
If you are baking puff pastry, croissants, or biscuits, a cold start can sometimes be beneficial.
- The Reason: These items rely on fats (like butter) melting at a specific rate to create layers. If the air is too hot immediately, the outside may brown and harden before the inside has had enough time to rise or “puff,” resulting in a burnt exterior and raw dough center.
2. Reheating Leftovers (The “Revival” Method)
When you’re bringing yesterday’s pizza or fries back to life, skipping the preheat is often safer.
- The Reason: Leftovers are already cooked and prone to drying out. A gradual warm-up allows the interior to heat through without scorching the already-browned crust.
- The Pro Move: Start cold and check the food every 2 minutes. This “gentle climb” in temperature restores the crunch without turning your pizza into a cracker.
3. Thick, Fatty Meats (Like Thick-Cut Bacon)
Much like starting bacon in a cold pan on the stove, a cold start in the air fryer can be superior for high-fat meats.
- The Reason: Starting cold allows the fat to “render” (melt) slowly as the temperature rises. This leads to a crispier texture and prevents the fat from splattering violently against the heating element—which, as we’ve noted in our maintenance guides, is the leading cause of kitchen smoke.
4. Thin, High-Sugar Foods
Foods with high sugar content (like honey-glazed salmon or sweet potato slices) can burn in seconds.
- The Reason: Sugar carmelizes—and then burns—very quickly at high temperatures. A cold start gives you a wider window of control to monitor the browning process.
If you choose to skip preheating, remember to add 2–3 minutes to your total cooking time. Most recipes assume a hot start; if you start cold, that initial “warm-up” period doesn’t count toward the actual cooking.
Technical Insight: As our surveys on power consumption suggest, skipping preheat doesn’t necessarily save a significant amount of electricity, as the machine still has to reach the target temperature eventually. The choice to skip should be based on food quality and texture, not energy savings.
Common Mistakes to Avoid

Even though preheating your air fryer is simple, there are a few common mistakes that can impact your cooking results. Let’s go through them so you can avoid these pitfalls and make the most of your air fryer every time!
Skipping Preheating When It’s Needed
One of the most frequent mistakes is assuming that air fryers never need to be preheated. While some recipes might turn out fine without this step, foods that rely on high heat for crispiness—like fries, breaded chicken, or roasted veggies—really benefit from a hot cooking environment. Skipping preheating in these cases can lead to soggy, unevenly cooked results.
If you’re unsure, it’s usually safer to preheat than not. A few extra minutes can make all the difference.
Preheating for Too Long
On the flip side, letting your air fryer run empty for too long isn’t a good idea either. Air fryers heat up quickly—usually in three to five minutes—so there’s no need to preheat for 10 minutes or more. Over-preheating not only wastes energy but can also cause unnecessary wear on the appliance or create a burning smell.
Stick to the recommended preheating times, and you’ll avoid overheating issues.
Preheating with Food Inside
It might seem like a time-saver to put food in the basket before turning on the air fryer, but this often backfires. Starting with a cold air fryer means your food begins cooking slowly, which can result in uneven textures—crispy on one side, soggy on the other.
Always let the air fryer get up to temperature first, then add your food for the best results.
Crowding the Basket After Preheating
Even after preheating, it’s important to avoid overcrowding the basket. Packing food too tightly prevents proper airflow, which is key to the air fryer’s crisping magic. No amount of preheating can fix that.
For larger batches, cook in multiple rounds, or use air fryer racks to maximize space without compromising on texture.
Forgetting to Adjust Cooking Time
Once your air fryer is preheated, it cooks more efficiently—which means your food may need less time than expected. If your recipe doesn’t account for a preheated appliance, check for doneness a few minutes early. This is especially important for delicate foods that can overcook quickly, like fish or baked goods.
Avoiding these common mistakes ensures that your air fryer meals come out perfectly crisp, golden, and delicious every time. Now that you know what not to do, let’s wrap things up with a quick conclusion and a few helpful FAQs!
AirFryer Go Expert Tips for Success

To truly master your machine, you need to think beyond the buttons. At AirFryer Go, we’ve spent hundreds of hours testing different techniques to see what actually impacts the final result.
Here are our “Pro-Level” tips to ensure every preheated meal is a success:
1. The “Empty Basket” Rule
A common mistake is preheating with the food already inside.
- The Expert Way: Always preheat the basket completely empty.
- The Benefit: When you drop your food into a scorching hot basket, the contact point creates an immediate sear. This prevents sticking and ensures the bottom of your food is just as crispy as the top.
2. Mastering the Airflow “Buffer”
Air fryers rely on rapid air circulation. If you crowd the basket immediately after preheating, you kill the momentum of the heat.
- The Tip: Leave at least 20% of the basket space empty.
- The Secret: If you can’t see the bottom of the basket, you’ve put too much in. Cook in batches if necessary; since the machine is already preheated, the second batch will cook even faster than the first!
3. The Oil Timing Secret
Never spray your oil into the basket during the preheat phase.
- The Tip: Toss your food in a light coating of oil in a separate bowl before adding it to the preheated basket.
- The Reason: Spraying oil into an empty, hot basket can cause the oil to reach its smoke point prematurely, creating a burnt taste and potentially damaging the non-stick coating over time.
FAQs: Preheating Debunked
1. How do I know when my air fryer is actually preheated?
If your machine has a “Preheat” button, it will usually beep or display “Add Food.” If you are doing it manually, the 3-minute rule is your best bet. You can also listen to the machine—often, the fan will change its pitch slightly, or the “heating” light will flick off once the internal thermostat reaches the target temperature.
2. Can I put parchment paper in during the preheat?
Absolutely not. This is one of the most dangerous mistakes you can make. Air fryers work like a mini-tornado; without food to weigh it down, the parchment paper will be sucked upward into the heating element. This can cause the paper to catch fire or melt onto the coils. Always wait until the preheat is finished and you are ready to add your food.
3. Does preheating use a lot of electricity?
While the heating element works at maximum capacity during the preheat phase, it only lasts for about 3 minutes. In the long run, preheating actually saves energy because your food cooks faster and more efficiently in a saturated heat environment.
4. Should I leave the crisper tray in while preheating?
Yes. The tray is part of the cooking surface. You want that metal (or ceramic) tray to be scorching hot so that the moment your food touches it, the base starts crisping up.
5. Can I preheat with a small amount of water to keep food moist?
We don’t recommend this for preheating. Adding water creates steam, which is the enemy of the “crunch” you are looking for. If you need moisture, it is better to add it during the actual cooking cycle, but even then, use caution to avoid splattering the heating element.
Conclusion: Start Hot, Eat Better
In the world of modern cooking, speed is often the priority, but as we’ve discovered, taking just three extra minutes can be the difference between a mediocre meal and a culinary masterpiece. At AirFryer Go, we believe that mastering the “Start Hot” philosophy is the simplest way to upgrade your kitchen game without spending a dime on new equipment.
The “Preheat” Advantage
By taking the time to let your machine reach its target temperature, you aren’t just following a step—you’re ensuring success:
- Instant Texture: Achieve that “shattering” crunch on the outside while keeping the inside juicy.
- Predictable Timing: Stop guessing if the food is done; a preheated machine follows recipe times with precision.
- Professional Results: Whether it’s a Ninja, Gourmia, or Power XL, you are treating your air fryer like the powerful convection tool it truly is.
Cooking is an art, but it’s supported by the science of heat. A clean, well-maintained machine that is properly preheated will outperform a brand-new one used incorrectly every single time.
Recommended next reads:
How to Clean an Air Fryer: The Ultimate Guide to a Sparkling Machine
Air Fryer: Is It Worth It? A Brutally Honest Guide to Pros & Cons